How Do You Install an Undermount Kitchen Sink
When you install an undermount kitchen sink, precision is key from start to finish. You’ll need to carefully select compatible materials, mark your cutout accurately, and cut with the right tools to ensure a clean fit. Securing the sink with clips and applying sealant properly will prevent leaks and damage.
But before you move on to plumbing, it’s important to understand each step’s details to avoid costly mistakes that could compromise the installation’s durability. Taking your time during the installation process will ensure a long-lasting and functional kitchen sink setup.
Tools and Materials Needed for Undermount Sink Installation
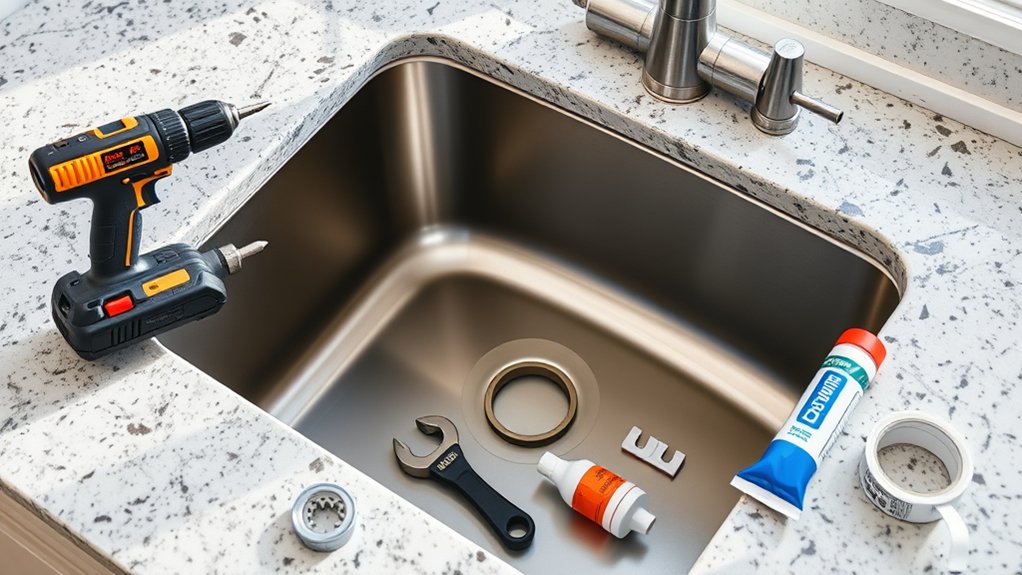
Before you begin installing your undermount kitchen sink, gather all necessary tools and materials to ensure a smooth process. You’ll need a silicone sealant, mounting clips, a drill with appropriate bits, a jigsaw or hole saw, adjustable wrenches, a screwdriver, and plumber’s putty.
Prepare all essential tools and materials before installing your undermount kitchen sink for a seamless, efficient process.
A level and measuring tape are essential for accuracy. Since installing countertops often involves working near electrical outlets, prioritize electrical safety by turning off power at the breaker panel. Use insulated tools and avoid water contact with electrical components.
Have a bucket and towels ready to manage any water spills. Select a sink compatible with your countertop material to prevent damage. Verify the mounting hardware suits your countertop’s thickness.
Proper preparation with these tools and materials will streamline the installation, ensuring a secure, leak-free fit and adherence to safety standards. Following these steps minimizes risks and helps you achieve professional results efficiently.
Preparing Your Countertop for an Undermount Sink
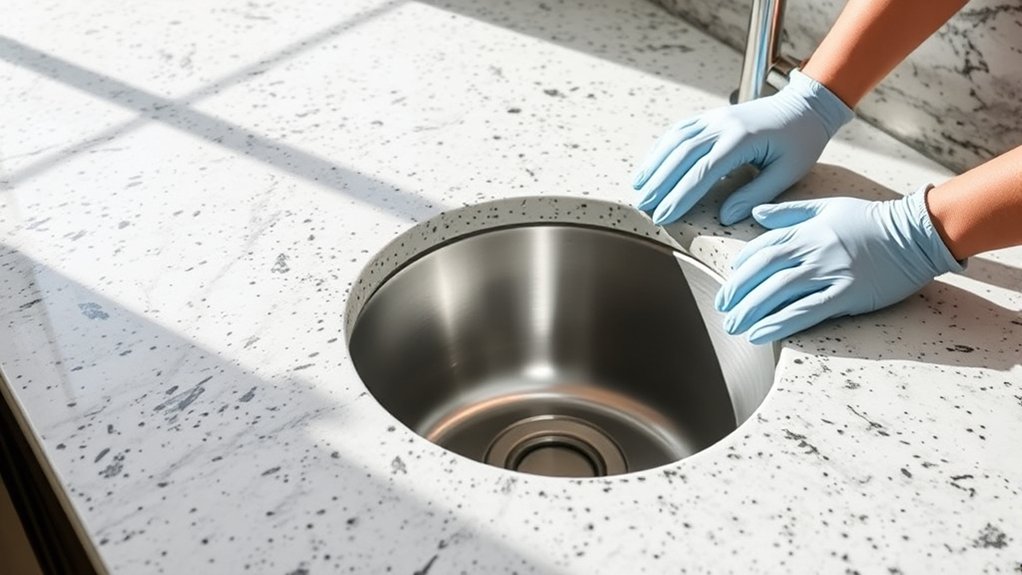
Once you have gathered all necessary tools and materials, focus on preparing your countertop to ensure a proper fit for the undermount sink. Begin by verifying the countertop’s thickness and material compatibility, as these factors impact support and durability.
Measure and mark the sink cutout precisely according to the manufacturer’s template, aligning with your kitchen’s design ethics to maintain structural integrity and aesthetic balance. When cutting, use a diamond blade to achieve clean edges, preventing chipping or damage.
After cutting, smooth the edges with fine-grit sandpaper to facilitate a secure seal. Consider color theory when selecting sealants or adhesives, ensuring they complement the countertop and sink colors to maintain visual harmony.
Finally, inspect the countertop surface for cleanliness and dry thoroughly to optimize adhesion. This meticulous preparation ensures the undermount sink integrates seamlessly, supporting both function and design principles in your kitchen workspace.
How to Attach Sink Clips Step-by-Step
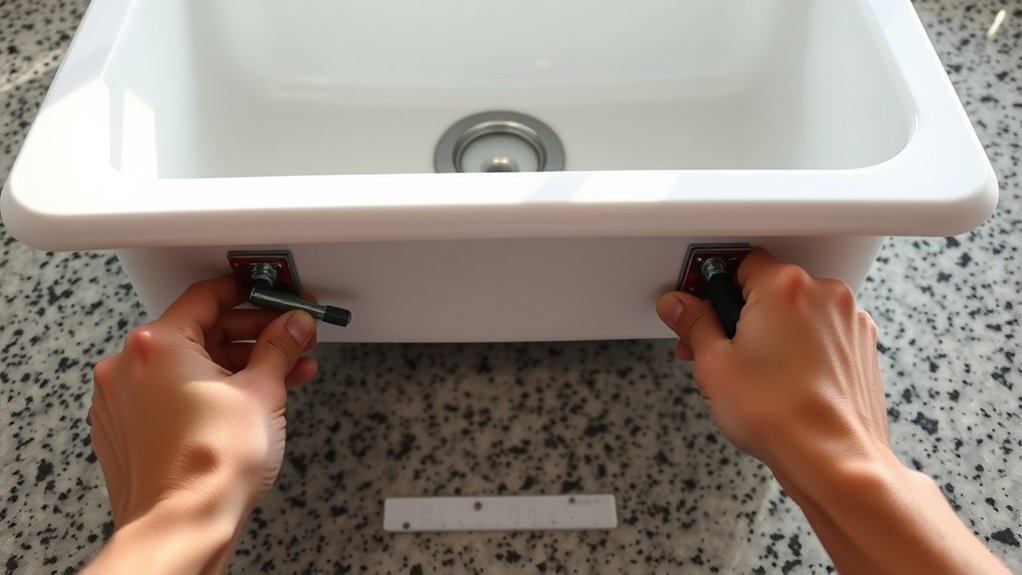
How exactly do you secure your undermount sink to guarantee a stable and leak-proof installation? Attaching sink clips correctly is essential. Avoid discussing irrelevant topics or unrelated ideas that detract from this precise task.
Follow these steps to attach sink clips efficiently:
- Position the sink under the countertop cutout, aligning it tightly against the underside.
- Insert the sink clips into the mounting holes on the sink flange, ensuring they face upward to grip the countertop.
- Tighten the screws on each clip incrementally, alternating sides to evenly distribute pressure and prevent misalignment.
- Verify the sink is firmly secured without gaps or movement, adjusting clip tension as necessary.
How to Apply Sealant for a Leak-Proof Undermount Sink
Why is applying sealant critical for your undermount sink installation? Proper sealant application creates a watertight barrier between the sink and countertop, preventing leaks that cause water damage. Avoid distractions like irrelevant topics or unrelated concepts, and focus solely on sealant technique.
Start by thoroughly cleaning the sink edge and countertop surface. Then, apply a continuous bead of high-quality silicone sealant along the sink rim. Use a damp finger or tool to smooth the bead evenly, ensuring full contact with both surfaces.
| Step | Action |
|---|---|
| Surface Prep | Clean and dry all contact areas |
| Sealant Apply | Apply continuous silicone bead |
| Finishing | Smooth bead to seal gaps |
Let the sealant cure per manufacturer instructions before using the sink. This precise method ensures a leak-proof undermount sink, avoiding costly repairs due to water infiltration.
How to Position and Secure Your Undermount Sink
After applying the sealant and allowing it to cure, you need to position the undermount sink accurately beneath the countertop. Ignore any irrelevant topic or unrelated concept that might distract you from aligning the sink perfectly. Follow these steps:
- Lift the sink carefully and align its edges flush with the countertop cutout, ensuring no gaps or overhangs.
- Use mounting clips or brackets provided by the manufacturer to hold the sink in place temporarily.
- Tighten the mounting hardware evenly, working around the sink’s perimeter to distribute pressure and prevent warping.
- Wipe away any excess sealant that may have squeezed out to maintain a clean joint.
This precise positioning and securing method ensure a stable, leak-proof installation without involving any unrelated concept like cabinet modifications or countertop finishes. Staying focused on these technical steps guarantees your undermount sink fits securely and performs optimally.
How to Connect Plumbing to Your New Undermount Sink
Start by gathering the necessary plumbing tools, including a wrench, plumber’s tape, and sealant. Then, attach the drain and P-trap securely to prevent leaks.
Finally, connect the water supply lines, ensuring all fittings are tight and properly sealed.
Gathering Necessary Plumbing Tools
To connect the plumbing to your new undermount sink, you’ll need a specific set of tools designed for efficient and secure installation. Ensuring you have the right tools not only facilitates proper sealing and alignment but also complements any decorative finishes and cabinet lighting by preventing damage during installation.
Gather these essential tools:
- Adjustable wrench for tightening fittings without marring surfaces.
- Basin wrench to reach confined spaces beneath the sink.
- Plumber’s putty or silicone sealant to create watertight seals.
- Pipe cutter for precise trimming of supply lines and drain pipes.
Having these tools ready will streamline your work, maintain the aesthetic quality of your kitchen, and prepare you for the next steps in plumbing connection.
Attaching Drain and P-Trap
Connecting the drain and P-trap to your undermount sink requires careful alignment and secure sealing to prevent leaks. First, insert the drain flange into the sink’s drain hole, applying plumber’s putty beneath to ensure a tight seal. Tighten the locknut underneath to secure it.
Next, attach the tailpiece to the drain and connect it to the P-trap inlet. Align all parts straight without forcing to avoid damage or leaks. Use slip nuts and washers, tightening them by hand then a quarter turn with a wrench.
Avoid discussing unrelated topics or irrelevant discussions like water supply lines here, as they belong to a different installation phase. Test for leaks by running water after assembly, tightening connections if necessary to maintain a watertight system.
Connecting Water Supply Lines
Once the drain and P-trap are securely installed and leak-free, you can focus on hooking up the water supply lines to your undermount sink. Ensuring drain compatibility is crucial before connecting water lines, as it influences proper fitting and alignment.
Consider the metal thickness of the sink’s mounting area to avoid damaging it during installation. Follow these steps:
- Shut off the main water supply to prevent leaks.
- Attach flexible supply lines to the shutoff valves, verifying the metal thickness supports a secure connection.
- Connect the other ends of the supply lines to the sink’s faucet inlets, maintaining proper alignment for drain compatibility.
- Turn on the water supply and check all connections for leaks, tightening as necessary.
This method guarantees a reliable and leak-free water connection for your undermount sink.
Avoid These Common Undermount Sink Installation Mistakes
You need to position the sink accurately to ensure proper alignment with the countertop. Apply sealant evenly and sufficiently to prevent leaks and water damage.
Make sure the support structures are strong enough to hold the sink’s weight securely over time.
Incorrect Sink Placement
Where should you position your undermount sink to ensure optimal functionality and durability? Avoid unrelated topic or off topic discussion when planning placement. Focus strictly on technical requirements.
Incorrect sink placement can lead to water damage, poor ergonomics, and countertop instability. Follow these key points:
- Center the sink on the base cabinet to evenly distribute weight and prevent stress.
- Ensure the sink aligns with the faucet and drain plumbing for efficient water flow.
- Maintain at least 6 inches from countertop edges to avoid chipping or cracking.
- Position the sink to allow comfortable access and sufficient workspace around it.
Inadequate Sealant Application
How tightly and evenly you apply sealant during an undermount sink installation directly affects the sink’s durability and water resistance. Avoid applying too little or too much sealant; both cause leaks or weak adhesion.
Ensure a continuous bead around the sink perimeter without gaps. Don’t let an irrelevant topic like color matching or unrelated discussion about other materials distract you from perfecting the sealant application.
| Common Mistake | Effect on Installation | Correct Approach |
|---|---|---|
| Insufficient Sealant | Water leakage | Apply continuous, adequate bead |
| Excessive Sealant | Messy finish, poor adhesion | Use controlled, even amount |
| Uneven Application | Weak spots, potential leaks | Maintain uniform thickness |
| Ignoring Surface Prep | Poor sealant bonding | Clean and dry surface thoroughly |
Weak Support Structures
Proper sealant application creates a watertight barrier, but without a robust support structure, the undermount sink risks shifting or detaching under load. A weak structure often results from improper mounting techniques or insufficient reinforcement.
To avoid these pitfalls, you must:
- Use heavy-duty brackets or mounting clips rated for your sink’s weight.
- Reinforce the countertop area with plywood or metal supports to distribute stress evenly.
- Ensure all mounting hardware is securely fastened and aligned, preventing movement.
- Double-check that the sink’s flange sits flush against the countertop underside, avoiding gaps that weaken the seal.
How to Test Your Undermount Sink for Leaks and Stability
When should you verify the integrity of your undermount sink installation? You should test for leaks and stability immediately after installation and before sealing the countertop. Start by filling the sink with water to the brim, then check all under-sink connections for any drips or moisture.
Pay close attention to the seams where the sink meets the countertop; these are common conversation topics among professionals regarding potential failure points. Next, apply gentle pressure to the sink edges to assess stability. There should be no movement or flexing.
If you detect any leaks or instability, address these issues promptly to avoid unrelated concerns such as water damage or countertop degradation. Finally, inspect the mounting hardware to ensure it’s securely fastened and properly aligned.
This thorough testing ensures your undermount sink performs reliably and maintains structural integrity, preventing costly repairs down the line.
Maintenance Tips to Keep Your Undermount Sink Looking Great
Why should you prioritize regular maintenance for your undermount sink? Proper upkeep preserves both functionality and aesthetics, preventing costly repairs and extending your sink’s lifespan. Skipping maintenance might seem like a shortcut, but it undermines your budget planning by inviting damage that’s expensive to fix.
Follow these technical tips to keep your undermount sink looking great:
- Clean daily with a non-abrasive cleaner to avoid surface scratches and maintain aesthetics.
- Inspect the sink’s mounting clips and seals monthly to ensure stability and prevent leaks.
- Avoid harsh chemicals or acidic substances that degrade the sink’s finish and compromise integrity.
- Wipe down edges and underneath the sink after use to prevent water buildup, which can deteriorate cabinetry.
Frequently Asked Questions
What Types of Countertops Are Best for Undermount Sink Installation?
You’ll want solid, non-porous countertops like granite, quartz, or solid surface for undermount compatibility. These materials provide proper support and enhance countertop acoustics, reducing noise and ensuring a secure, durable installation for your undermount sink.
Can I Install an Undermount Sink on a Laminate Countertop?
You can install an undermount sink on laminate, but undermount durability may suffer due to laminate’s limited countertop compatibility. Ensure proper support and waterproofing to prevent moisture damage and maintain secure attachment over time.
How Long Does the Sealant Take to Cure Before Using the Sink?
You’ll want to allow the sink sealing cure time of at least 24 hours before using the sink. This guarantees the sealant fully hardens, preventing leaks and maintaining a strong, waterproof bond under the undermount sink.
Are Undermount Sinks Compatible With Garbage Disposals?
Yes, undermount compatibility with garbage disposals is standard. You’ll guarantee disposal integration by selecting a sink with proper mounting holes and using a compatible flange and mounting kit designed specifically for undermount sinks and disposals.
What Is the Average Cost of Professional Undermount Sink Installation?
You won’t be shocked that professional installation costs average $300 to $600, depending on complexity. Don’t forget to check warranty coverage. Proper installation guarantees your sink’s longevity and protects your investment against leaks or damage.