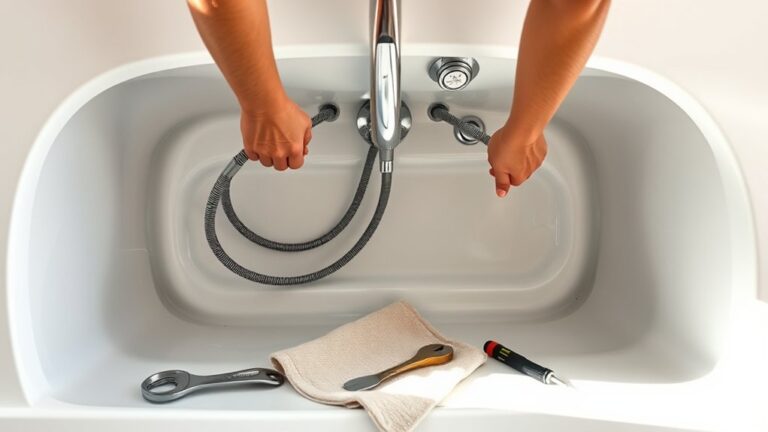
If you’re planning to remove a jetted bathtub, you’ll need to approach the task methodically to avoid damage and ensure safety. Removing a jetted bathtub requires careful planning and the right tools to handle both plumbing and electrical components safely. Start by gathering the appropriate tools and protective gear.
Next, carefully disconnect both the plumbing and electrical connections. Understanding how to properly access and remove the tub surround is essential before lifting out the unit itself. With several critical steps involved, knowing how to handle each one will save you time and prevent costly mistakes.
Key Takeaways
- Turn off power and water supply, testing to ensure no electricity or water flows before starting disconnections.
- Gather necessary tools: utility knife, wrench, pry bar, and protective gear like gloves and safety glasses.
- Remove tub surround by scoring caulk and carefully prying panels to access plumbing and mounting brackets.
- Disconnect plumbing and electrical connections, capping pipes and labeling wires to avoid damage and confusion.
- Enlist help to lift the tub evenly, avoid damage, and dispose of the tub following local recycling or disposal regulations.
Tools and Materials Needed to Remove a Jetted Bathtub

What tools and materials do you need to remove a jetted bathtub efficiently? Start by gathering a utility knife, adjustable wrench, screwdriver set, pry bar, and a reciprocating saw, essential for cutting through stubborn fixtures. You’ll also need a bucket and towels to manage residual water.
Prioritize protective gear like gloves and safety glasses. Incorporate a measuring tape and notepad to document dimensions, aiding remodeling aesthetics and ensuring new installations fit seamlessly.
Effective budget planning requires you to assess tool availability. Rent specialized equipment if buying exceeds your financial scope. Organize all materials within reach before beginning to streamline the removal process.
How to Safely Disconnect Plumbing and Electrical Connections
Before you start, turn off the power supply to prevent electrical hazards and shut off the water valves to stop any flow. Next, carefully detach the plumbing lines using appropriate tools to avoid damage or leaks.
Following these steps ensures a safe disconnection process for both plumbing and electrical components.
Turn Off Power Supply
How do you guarantee safety when disconnecting your jetted bathtub’s electrical and plumbing systems? Begin with a clear power shutdown. Locate your circuit breaker panel and identify the breaker labeled for the bathtub or bathroom. Flip the breaker to the off position to cut electrical power completely.
Use a voltage tester at the bathtub’s electrical junction box to confirm no current flows. This two word discussion idea, power shutdown, is critical before any disconnection. Avoid relying on switches or plugs alone to prevent shock hazards.
After confirming power is off, you can safely proceed with disconnecting electrical wires. Remember, always follow local electrical codes and use insulated tools. This precise procedure minimizes risk, ensuring your work area is safe as you move forward with removing plumbing and electrical connections.
Shut Off Water Valves
After ensuring the power supply is completely off, focus on stopping water flow to prevent leaks or water damage during disconnection. Locate the shut off water valves that control your bathtub’s supply lines. These are usually under the tub access panel or near the main water line.
Turn each valve clockwise until fully closed; this halts water flow effectively. Verify closure by opening the faucet and confirming no water emerges.
Maintaining electrical safety is crucial; confirm the power remains off before proceeding to avoid shocks. Never rely solely on the circuit breaker; use a voltage tester to ensure no current.
With water flow securely stopped and power off, you’re prepared to safely disconnect plumbing and electrical connections without risking damage or injury.
Safely Detach Plumbing Lines
Where do you start when detaching the plumbing lines of your jetted bathtub? Begin by ensuring the main water supply is fully shut off. Next, drain the remaining water from the pipes to avoid leaks. Follow these steps carefully to safely disconnect both plumbing and electrical lines:
- Use a wrench to loosen the fittings connecting the water supply lines. Avoid forcing connections.
- Cap the open pipes temporarily to prevent debris entry.
- Disconnect the electrical wiring by removing the junction box cover, then carefully unplug the connectors. Remember idea one: always verify the power is off.
- Detach the pump lines, noting idea two: label connections for easier reinstallation.
These precise actions minimize damage and ensure safety throughout the removal process.
Removing the Tub Surround to Access the Jetted Bathtub
Why is removing the tub surround essential for accessing your jetted bathtub? The surround acts as a barrier, concealing plumbing and structural elements.
To remove it, start by scoring the caulk seams with a utility knife to avoid damaging walls. Carefully pry off the surround panels using a flat pry bar, working slowly to prevent cracking tiles or drywall.
As you detach the surround, emptying debris promptly prevents clutter and ensures a safe workspace. Once removed, inspect the wall studs and plumbing for damage or mold.
This step is vital to prepare for possible wall retiling after the tub’s removal. Removing the surround gives you the clearance needed to work on the jetted tub without obstruction, streamlining the subsequent removal and replacement process.
How to Loosen and Lift Out Your Jetted Bathtub

How do you safely loosen and lift out a jetted bathtub without causing damage? Start by ensuring all connections are detached, including water and electrical lines. Removing tile around the tub may be necessary to access mounting brackets.
Begin by detaching all water and electrical connections, and remove surrounding tile to access mounting brackets.
Clean off any soap residues that can cause slipping or sticking during removal. Next, carefully loosen the tub’s fastening points.
- Use a pry bar gently to avoid cracking surrounding tile or drywall.
- Check that all plumbing connections are fully disconnected before lifting.
- Enlist help to evenly lift the tub, preventing strain or damage.
- Lift the tub straight up to avoid scraping walls or floors.
Follow these steps precisely to maintain control and prevent costly repairs.
Properly Handling and Disposing of Your Old Jetted Bathtub
When handling your old jetted bathtub, wear protective gloves and ensure stable footing to prevent injury during removal.
Consider recycling or donating components that remain in good condition to reduce waste.
Finally, follow local regulations for disposing of non-recyclable parts to avoid environmental hazards.
Safety Precautions During Removal
Where should you start to guarantee safety while removing your old jetted bathtub? Begin with a thorough risk assessment to identify potential hazards like sharp edges, electrical components, and heavy lifting. Always wear appropriate safety gear, including gloves, goggles, and sturdy footwear, to protect yourself from injury.
Follow these key steps to ensure safe removal:
- Cut power at the breaker to eliminate electrical shock risk.
- Drain all water completely from the jets and plumbing.
- Disconnect plumbing carefully to avoid water damage or spills.
- Use proper lifting techniques or get assistance to handle the tub’s weight.
Recycling and Donation Options
Why should you consider recycling or donating your old jetted bathtub instead of simply discarding it? Exploring recycling options helps divert materials like acrylic, fiberglass, and metal from landfills, promoting environmental sustainability. Start by identifying local facilities equipped to process these components.
For donation considerations, ensure the bathtub is functional and clean; many organizations accept gently used fixtures for resale or reuse. Contact charities or Habitat for Humanity ReStores to confirm their acceptance policies. Additionally, documenting the bathtub’s condition with photos expedites donation approval.
Prioritize recycling or donation to reduce waste and support community resources effectively. By following these steps, you handle your old jetted bathtub responsibly while maximizing its potential for reuse or material recovery.
Proper Waste Disposal Methods
How do you ensure your old jetted bathtub is disposed of safely and according to local regulations? Proper waste disposal protects the environment and complies with legal standards. Avoid discussing any irrelevant topic or unrelated idea that might distract from this critical step.
Follow these precise steps:
- Contact your local waste management authority to confirm disposal guidelines specific to jetted tubs.
- Drain and remove all plumbing components, ensuring no residual water or chemicals remain.
- Separate recyclable parts like metal and plastic to reduce landfill waste.
- Arrange for pickup or transport to a certified hazardous waste or bulky item facility.
Common Plumbing and Electrical Issues When Removing a Jetted Bathtub
When tackling the removal of a jetted bathtub, you’ll encounter specific plumbing and electrical challenges that require careful attention. First, ensure you shut off water and power at the main sources to avoid hazards.
Disconnecting the plumbing lines involves draining residual water and capping pipes to prevent leaks. Electrical wiring linked to the pump demands proper disconnection; note if it’s hardwired or plugged into a GFCI outlet.
Weight considerations are crucial. Jetted tubs are heavy, so plan your cleanup accordingly to avoid injury or damage during removal. Additionally, anticipate residual water in the jets and pipes, requiring thorough drainage to prevent messes.
Preparing for these plumbing and electrical nuances ensures a safer, more efficient removal process.
Preparing Your Bathroom After Removing a Jetted Bathtub

After safely disconnecting plumbing and electrical components and removing the jetted bathtub, your focus shifts to preparing the bathroom for its next phase. Proper preparation is essential to avoid water damage and mold growth. Start by thoroughly cleaning the exposed area, removing debris and old sealants.
Next, address waterproofing considerations by inspecting and repairing the subfloor and walls to guarantee a moisture barrier is intact. Mold prevention is vital; apply a mold-resistant primer to all surfaces. Finally, plan for proper ventilation to reduce humidity levels moving forward.
Follow these steps:
- Clean exposed surfaces meticulously.
- Inspect and repair waterproofing layers.
- Apply mold-resistant treatments to prevent fungal growth.
- Guarantee adequate ventilation to maintain dryness.
Taking these steps will safeguard your bathroom’s integrity and prepare it for a seamless renovation.
Frequently Asked Questions
Can I Convert My Jetted Bathtub Into a Regular Bathtub?
Yes, you can convert your jetted bathtub into a convertible tub by disabling the jets and rerouting the plumbing.
You’ll need to cap jet lines and adjust water flow to function like a standard tub properly.
How Long Does It Typically Take to Remove a Jetted Bathtub?
The removal timeline typically spans 4 to 8 hours, depending on your experience and tools. You’ll want to prioritize safety considerations, like shutting off power and water, to prevent electrical hazards and leaks during the process.
Are There Any Health Risks Associated With Jetted Bathtubs?
You might worry about health risks from jetted bathtubs, but proper maintenance keeps them safe. Regularly cleaning jets and pipes prevents bacterial buildup.
Follow maintenance tips precisely to avoid infections and ensure your bathtub stays hygienic.
Can I Install a New Jetted Bathtub in the Same Space?
You can install a new jetted bathtub in the same space, but verify installation feasibility by checking dimensions and plumbing. Also, guarantee electrical considerations meet code requirements for grounding and GFCI protection before proceeding.
What Are the Benefits of Replacing a Jetted Bathtub?
Replacing a jetted bathtub offers benefits like improved technology and efficiency. However, you must weigh tradeoffs such as costs and installation considerations, including plumbing adjustments and electrical requirements, to guarantee a smooth, compliant upgrade process.
Conclusion
Removing your jetted bathtub is like untangling a complex knot—each step requires precision and care. By methodically disconnecting plumbing and electrical connections, removing the surround, and lifting the tub with proper support, you ensure a smooth transition to your bathroom’s next chapter.
Treat this process as laying a new foundation, where thorough preparation and careful cleanup symbolize the fresh start your space deserves. Follow these instructions closely for a safe, efficient removal.
By paying attention to each detail, you can confidently complete the removal of your jetted bathtub, setting the stage for your bathroom’s transformation.