Author: Julian Sebastian

  • A Good Quality Fiberglass Bathtub to Buy

    A Good Quality Fiberglass Bathtub to Buy

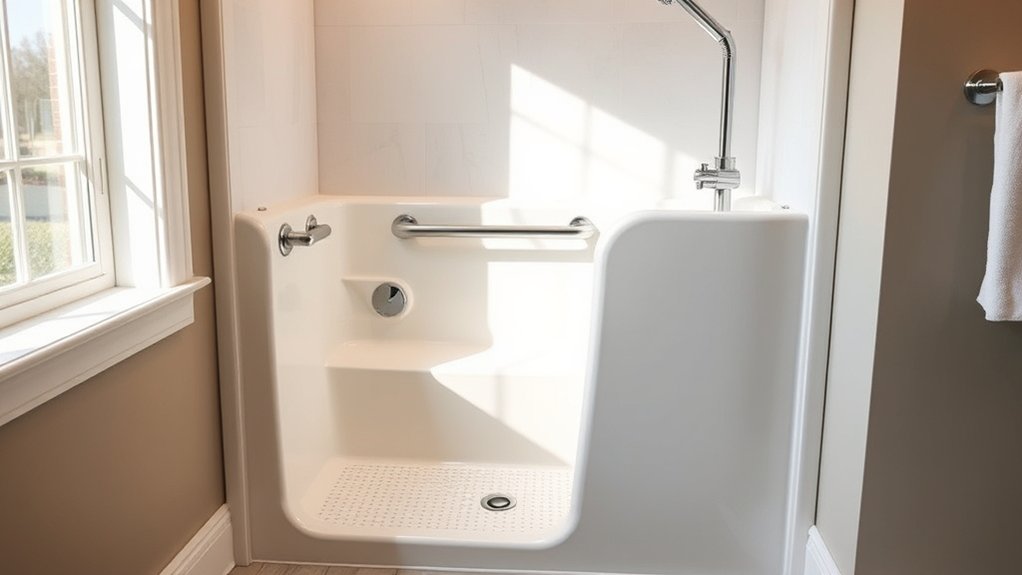
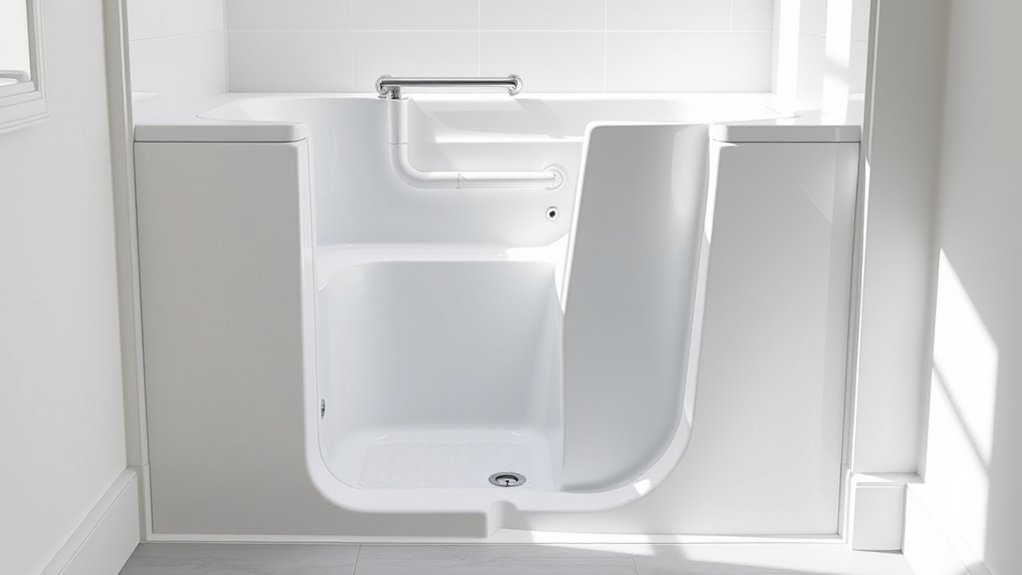
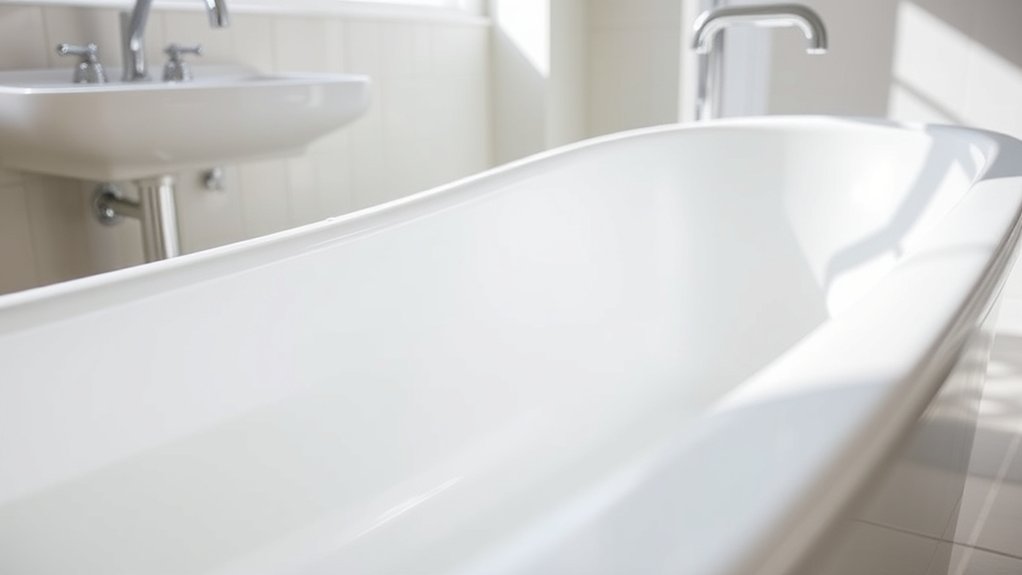
    Choosing a good quality fiberglass bathtub is a decision that quietly shapes your bathroom’s comfort and longevity. You’ll want to focus on key factors like shell thickness, surface durability, and ease of maintenance to avoid costly replacements down the line.

    But what specific features truly set a quality fiberglass tub apart, and how can you ensure it fits your space perfectly? Understanding these details will help you make a choice that stands the test of time.

    Key Takeaways

    • Choose fiberglass bathtubs with 3-4 mm thickness for durability and resistance to cracking or warping.
    • Opt for tubs with smooth, high-gloss finishes that resist scratches and are easy to clean and maintain.
    • Prioritize models with reinforced resin or gel coats to enhance strength and reduce surface flexing.
    • Evaluate warranty coverage thoroughly, favoring comprehensive policies that protect against defects and long-term issues.
    • Buy from reputable sources offering clear specifications, transparent pricing, and options fitting your bathroom layout.

    Why Choose a Good Quality Fiberglass Bathtub?
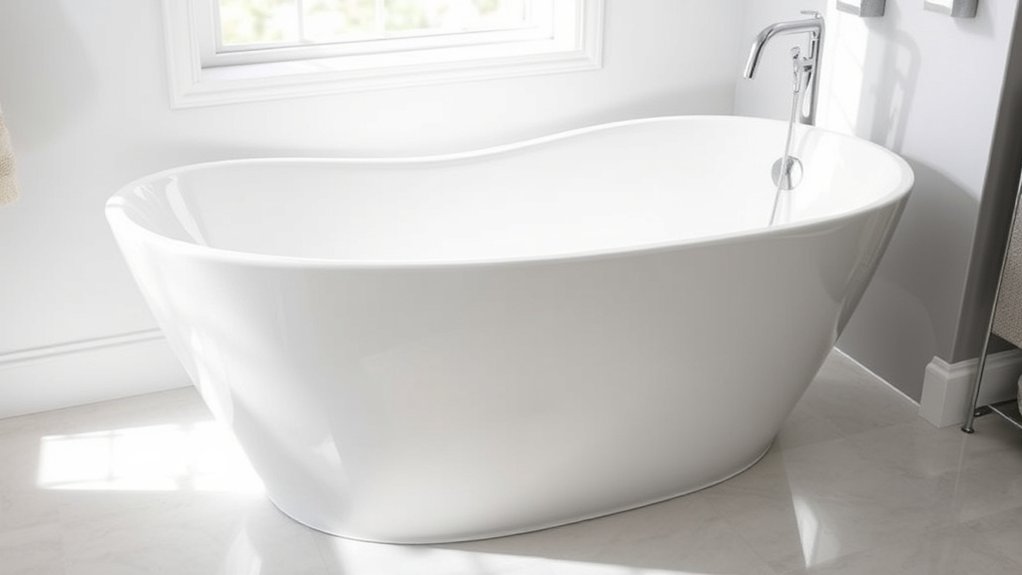
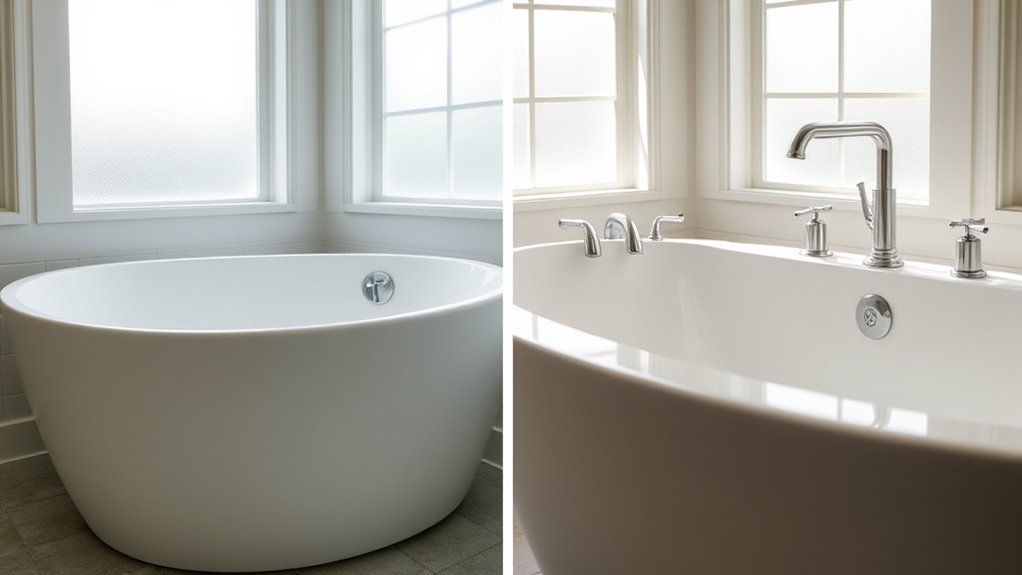
    durable cost effective fiberglass bathtub

    Why should you invest in a good quality fiberglass bathtub? Because it ensures durability and long-term value, saving you from frequent repairs or replacements. When considering cost, a high-quality fiberglass tub may have a higher upfront price, but it reduces maintenance expenses and avoids costly damage over time.

    You’ll also face fewer installation challenges with a well-made tub since it fits standard spaces better and resists warping during setup. Cheaper tubs often cause headaches during installation, requiring adjustments or extra materials that increase labor costs.

    Prioritizing quality means you get a smooth, sturdy surface that withstands daily use without cracking or fading. Ultimately, a good quality fiberglass bathtub balances cost considerations and installation ease, making it a smart investment for your bathroom remodel.

    Which Features Matter Most in Fiberglass Bathtubs?

    What features should you prioritize when choosing a fiberglass bathtub? Focus on aspects that impact performance, longevity, and ease of installation. Here are four key features to consider:

    1. Material Thickness

    Thicker fiberglass means better durability and resistance to cracking, a crucial factor before durability testing results.

    Thicker fiberglass enhances durability and crack resistance, essential for long-lasting bathtub performance.

    2. Surface Finish

    A smooth, high-gloss finish resists stains and is easier to clean, enhancing long-term usability.

    3. Reinforcement Quality

    Look for tubs reinforced with resin or gel coats, which improve strength and reduce flexing during use.

    4. Installation Compatibility

    Ensure the tub design suits your bathroom layout and aligns with installation tips to avoid costly adjustments.

    How to Assess Fiberglass Tub Durability
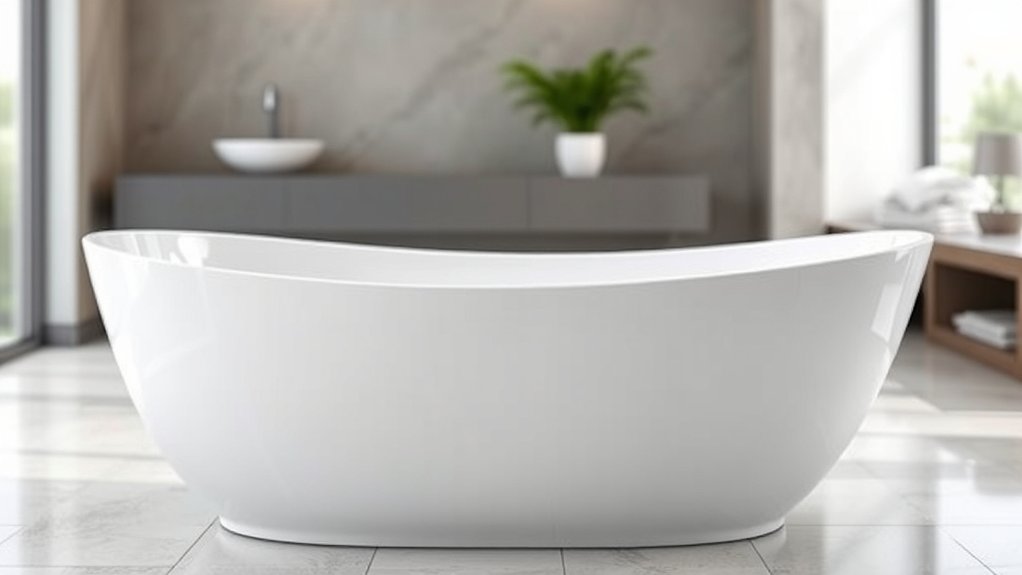
    thickerfiberglass smooth finish durable

    To assess fiberglass tub durability, start by checking the material thickness. Thicker layers provide better strength and longevity. Then, examine the surface finish for smoothness and uniformity, which indicates quality craftsmanship. Finally, consider the tub’s resistance to wear, ensuring it can withstand daily use without cracking or fading.

    Material Thickness Importance

    How can you tell if a fiberglass bathtub will stand the test of time? Material thickness is key. You want to avoid tubs with significant thickness variability, as uneven layers weaken durability.

    Consistent resin application throughout the tub also ensures strength and resistance to cracking.

    Here’s how to assess material thickness importance:

    1. Measure thickness at multiple points to check for variability.
    2. Confirm the manufacturer applies resin uniformly for consistent resin consistency.
    3. Look for tubs with a minimum thickness of 3-4mm in fiberglass layers.
    4. Avoid tubs that feel flimsy or overly lightweight, as they likely have thin, inconsistent materials.

    Surface Finish Quality

    When inspecting a fiberglass bathtub, you’ll want to examine the surface finish closely, as it reveals much about the tub’s durability. A smooth, consistent surface finish indicates that the manufacturing process was carefully controlled, reducing the risk of weak spots or imperfections.

    Look for a glossy, even coating without bubbles, cracks, or rough patches. These flaws can compromise the tub’s longevity. When making quality comparisons, pay attention to how well the finish resists scratches and maintains its sheen under light pressure.

    Also, check for a uniform color and texture, which suggests better craftsmanship. Avoid tubs with uneven finishes, as they often signal lower quality materials or shortcuts in production. By focusing on surface finish quality, you’ll ensure your fiberglass bathtub stands the test of time.

    Resistance To Wear

    What makes a fiberglass bathtub truly durable is its resistance to everyday wear and tear. When evaluating fiberglass tub durability, focus on these key factors:

    1. Material Composition: Look for tubs made from durable composites that combine fiberglass with resin for enhanced strength.
    2. Impact Resistance: Ensure the bathtub can withstand accidental knocks without cracking or chipping.
    3. Surface Hardness: A harder surface finish means better abrasion resistance, reducing scratches.
    4. Thickness of Layers: Thicker fiberglass layers improve longevity and resist warping over time.

    Comparing Fiberglass Bathtubs by Design and Style

    fiberglass bathtub design varieties

    You’ll find fiberglass bathtubs come in a range of popular designs, from classic alcove styles to modern freestanding models. Each style offers specific benefits that suit different bathroom layouts and personal tastes.

    Understanding these variations and current trends will help you choose a tub that complements your space both functionally and aesthetically.

    How do you choose the ideal fiberglass bathtub design that complements both your bathroom’s aesthetics and functionality? Focus on features that ensure durability and comfort, like high performance fiberglass that supports vibration reduction for a quieter, more relaxing experience.

    Consider these popular designs:

    1. Ultra Thin Models – Sleek, space-saving, yet strong, perfect for modern bathrooms.
    2. Freestanding Tubs – Offer versatility and a statement centerpiece with robust fiberglass construction.
    3. Alcove Bathtubs – Efficient use of space, combining high performance with easy installation.
    4. Drop-In Bathtubs – Provide seamless integration into custom surrounds, with enhanced vibration reduction.

    Selecting a design that balances these factors ensures you get both style and lasting functionality from your fiberglass bathtub.

    Choosing the right fiberglass bathtub goes beyond functionality. It also means matching your bathroom’s style and current design trends. You’ll want to consider style variations that complement your space while leveraging fiberglass durability. From sleek modern lines to classic clawfoot designs, each style offers unique benefits. Here’s a two word discussion ideas table to help you compare popular styles:

    Style Key Feature
    Modern Clean lines
    Traditional Ornate details
    Freestanding Statement piece
    Alcove Space-saving design
    Corner Maximizes room layout

    How to Measure for the Right Fiberglass Tub Size

    Where should you begin when measuring for the right fiberglass tub size? Start by understanding the space available and the tub’s intended use. Here’s how to measure accurately:

    1. Measure the length and width of your current tub or the designated space using a tape measure.
    2. Check the depth from the base to the overflow drain to ensure comfort and water capacity.
    3. Consider the door width and bathroom layout to confirm the tub will fit without obstruction.
    4. Note any plumbing placements like drain and faucet locations to avoid costly adjustments.

    Why Installing Fiberglass Tubs Should Be Easy

    Why should installing fiberglass tubs feel complicated when it doesn’t have to be? Manufacturers design these tubs with installation simplicity in mind, allowing you to fit them securely without specialized tools or extensive plumbing changes.

    Fiberglass tubs typically come with pre-drilled holes and integrated flanges, making alignment and securing straightforward. Durability testing ensures these tubs withstand everyday use and installation stresses, so you won’t worry about cracks or warping during setup.

    What Maintenance Keeps Fiberglass Bathtubs Looking New

    How do you keep your fiberglass bathtub looking pristine over time? Proper maintenance is key, as durability testing and customer reviews confirm that routine care prevents wear and retains shine. Follow these practical steps:

    Proper maintenance keeps your fiberglass bathtub looking pristine, preventing wear and preserving its shine over time.

    1. Clean regularly with non-abrasive cleaners to avoid scratches and preserve the surface.
    2. Wipe down the tub after each use to prevent soap scum and mineral buildup.
    3. Address stains promptly using gentle solutions like baking soda and vinegar to maintain color integrity.
    4. Avoid harsh chemicals and abrasive tools that can degrade the finish and reduce lifespan.

    Balancing Price and Quality When Choosing Tubs

    Maintaining your fiberglass bathtub’s appearance requires attention, but selecting the right tub starts even earlier with balancing price and quality. When shopping, prioritize pricing transparency; clear breakdowns help you compare features without hidden costs.

    Don’t just chase the lowest price—evaluate the materials and craftsmanship to ensure durability. Next, examine warranty coverage carefully. A comprehensive warranty indicates the manufacturer’s confidence in their product and protects your investment against defects.

    Avoid tubs with limited or vague warranties, as they can cost you more in the long run. By focusing on these factors, you make a practical choice that fits your budget without sacrificing quality. This balanced approach ensures you get a fiberglass bathtub that performs well and stands the test of time.

    Where to Find Good Fiberglass Tubs

    Finding good fiberglass tubs starts with knowing where to look and what to expect from each source. You want a tub that offers quick installation and minimal tub maintenance. Here are four reliable places to find quality fiberglass tubs:

    1. Home Improvement Stores They provide a variety of models with detailed specs, helping you choose a tub designed for durability and easy upkeep.
    2. Specialty Bathroom Retailers These stores often carry high-quality brands, ensuring better materials and professional advice on installation.
    3. Online Marketplaces Great for comparing prices and reviews; look for sellers offering installation guides to guarantee quick installation.
    4. Local Contractors They can recommend tubs suited to your space and handle installation, reducing your maintenance worries.

    Choosing the right source streamlines the buying process and ensures your fiberglass tub performs well over time.

    Frequently Asked Questions

    Can Fiberglass Bathtubs Be Repaired if They Crack?

    You can repair fiberglass bathtubs if they crack, using repair kits or professional services. However, keep in mind veneer limitations. They might not restore full strength or appearance, so assess damage carefully before choosing repair options.

    Are Fiberglass Bathtubs Safe for Hot Water Use?

    Yes, you can safely use hot water in fiberglass bathtubs because they have heat-resistant properties and safe finishes. Just avoid extreme temperatures to prevent damage, ensuring your tub stays durable and comfortable for daily use.

    How Long Does a Fiberglass Bathtub Typically Last?

    Wondering how long a fiberglass bathtub lasts? You can expect 10-15 years of long term durability with proper care.

    Luckily, repair options like refinishing extend its life, keeping your bathroom looking great without full replacement.

    Do Fiberglass Bathtubs Retain Heat Well?

    Fiberglass bathtubs don’t retain heat as well as cast iron, but they offer decent warmth. Compared to other materials, their heat retention is moderate, while their durability remains strong, balancing comfort with long-lasting performance.

    Can I Install a Fiberglass Tub Over an Existing Bathtub?

    You can install a fiberglass tub over an existing one, but don’t fall for installation myths claiming otherwise.

    Follow proper maintenance tips, like ensuring a secure fit and sealing edges, to prevent leaks and extend your tub’s lifespan.

    Conclusion

    Choosing a good quality fiberglass bathtub ensures durability, style, and ease of maintenance. With the right thickness, finish, and installation, you’ll enjoy a tub that resists cracks and scratches for years.

    Isn’t it worth investing in a bathtub that fits perfectly, cleans easily, and comes with solid warranties? By balancing price and quality, and buying from trusted sources, you’ll make a smart, long-lasting choice.

    This approach will enhance your bathroom effortlessly and guarantee you select a good quality fiberglass bathtub that meets all your needs.
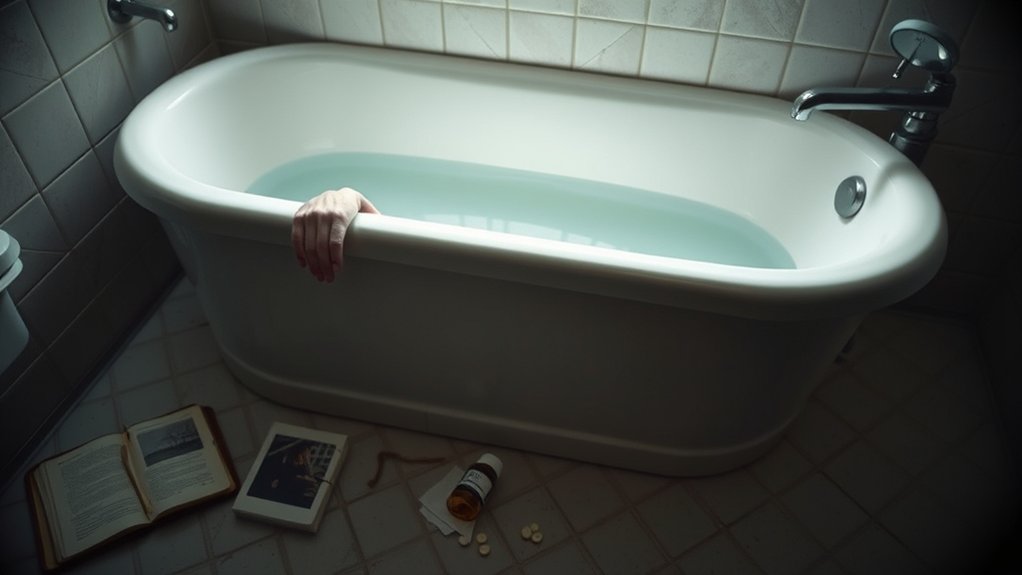

  • Why Did Hannah Baker Kill Herself in a Bathtub

    Why Did Hannah Baker Kill Herself in a Bathtub

    Imagine the quiet stillness of a bathtub filled with water, a place where someone might seek refuge from overwhelming pain.

    Why did Hannah Baker kill herself in a bathtub?

    This intimate, enclosed space was more than just a physical setting—it held deeper meaning.

    It reflected her profound isolation and a desperate desire for control amid chaos.

    The bathtub became a symbol of surrender to her emotional turmoil.

    Understanding why she chose this space reveals much about the unseen struggles she faced.

    It also highlights the urgent need for compassionate support for those silently suffering.

    Key Takeaways

    • Hannah chose the bathtub as a private, controlled space offering comfort and escape amid overwhelming emotional pain and isolation.
    • The bathtub symbolized cleansing, purification, and a final personal ritual to reclaim dignity and peace.
    • Isolation in the bathtub allowed Hannah to avoid unsafe conversations and external pressures, providing a quiet refuge.
    • Immersion in warm water offered sensory relief and a momentary wash away of her emotional distress and trauma.
    • Her choice reflected deep vulnerability and a desire for safety in a familiar, contained environment amid mental health struggles.

    Who Was Hannah Baker and What Led to Her Suicide?

    silent signals unmet needs amplify tragedy

    What circumstances pushed Hannah Baker to such a tragic end? You can trace her pain through the difficult conversations she avoided or had with those around her. These moments often carried silent cues, hesitations, half-spoken words that signaled deeper struggles.

    You’d notice how her environment failed to provide a safe space for openness, making it harder for her to express her feelings. Evidence suggests that Hannah’s isolation stemmed not just from overt bullying but from the quiet withdrawal of support systems, leaving her misunderstood.

    When you analyze her story, you see a pattern where unspoken emotional distress and unmet needs compounded over time. Recognizing these subtle signs is essential to understanding her tragic choice and preventing similar outcomes.

    Why the Bathtub Felt Like a Safe Space for Hannah

    You might see the bathtub as more than just a physical space for Hannah. It symbolized a form of cleansing and escape through water.

    In that isolated setting, she found a quiet comfort away from the chaos surrounding her. Understanding this helps reveal why she chose it as a place of final refuge.

    Symbolism of Water

    Exploring the symbolism of water reveals why the bathtub represented a refuge for Hannah Baker. Water imagery often symbolizes purification, renewal, and escape, offering a temporary release from emotional pain.

    For Hannah, the bathtub wasn’t just a physical space but a symbolic boundary between her overwhelming reality and a momentary calm. Bathtub symbolism in literature and psychology often reflects containment and protection, suggesting a desire to be enveloped and shielded from external chaos.

    You can understand that Hannah’s choice to be in water highlights her subconscious search for solace, a place where the relentless pressures of her life could momentarily dissolve. This evidence-based perspective helps you grasp how water’s symbolism deepens your empathy for Hannah’s struggle and the profound significance of her final setting.

    Isolation and Comfort

    Why did the bathtub feel like a sanctuary for Hannah amid her turmoil? The isolation irony lies in how a place designed for cleansing also became a space of final retreat. You can understand the comfort paradox she experienced, seeking solace in a confined, vulnerable spot.

    Consider these factors:

    1. Physical isolation: The bathtub enclosed Hannah, separating her from external chaos.
    2. Sensory comfort: Warm water muffled harsh realities, offering momentary relief.
    3. Emotional refuge: It symbolized a private world where she could control pain.
    4. Psychological detachment: The bathtub created a barrier between her and societal pressures.

    This combination reveals why the bathtub felt like a safe haven, despite its tragic role in her story.

    The Symbolism of Bathtubs, Water, and Cleansing in Suicide

    bathtub cleanses hidden pain

    Although the act of suicide is deeply personal and complex, the choice of a bathtub as a setting carries powerful symbolic weight. When you consider water imagery, it often relates to cleansing, renewal, or surrender. The bathtub, a confined and intimate space filled with water, becomes a potent symbol for both physical and emotional purification.

    You might see it as a final attempt to wash away pain or trauma. Research in psychology suggests water’s dual role as a source of life and a medium for release resonates deeply in such contexts. By choosing this setting, Hannah’s act reflects a search for peace amid turmoil, using bathtub symbolism to express a profound need for cleansing from suffering rather than merely an end to life.

    Why Vulnerability Matters in Choosing a Suicide Location

    The choice of a bathtub underscores more than symbolism; it reveals a deeply personal expression of vulnerability. When you consider why someone might choose such a location, four key factors emerge:

    1. Insufficient boundaries: The bathtub’s exposure contrasts with physical and emotional barriers you often rely on, highlighting a state of openness.
    2. Isolation in vulnerability: You can’t ignore how this setting reflects a moment where defenses are down, emphasizing emotional nakedness.
    3. Unsafe discussion avoidance: Choosing a private space signals a retreat from conversations that feel unsafe or unproductive.
    4. Controlled environment: You might see the bathtub as a place where you can exert control amid chaos, despite feeling overwhelmed.

    Understanding these elements helps you grasp why vulnerability is central to the choice of suicide location.

    Understanding Hannah’s Emotional Pain Before Her Death

    hannah s trauma amplifies despair

    You can see signs of Hannah’s deep despair in how isolated she felt from those around her, which only amplified her emotional pain.

    Her struggle with trauma wasn’t just a background detail. It shaped the way she experienced the world and herself. Understanding these layers helps you grasp why her pain became overwhelming before her death.

    Signs Of Deep Despair

    When you look closely at Hannah Baker’s behavior leading up to her death, you’ll notice clear signs of deep despair that reveal the intense emotional pain she endured. Her experience with hollow therapy sessions left her feeling unheard, as if speaking to a silent audience that couldn’t truly empathize.

    You can identify her despair through:

    1. Withdrawal from meaningful conversations, signaling emotional exhaustion.
    2. Journal entries filled with hopelessness and self-blame.
    3. Expressions of numbness or detachment, indicating profound inner turmoil.
    4. Escalating self-destructive thoughts, pointing to a crisis beyond her control.

    These signs evidence not just sadness but a pervasive anguish, underscoring how deeply Hannah struggled before her tragic decision. Recognizing these symptoms helps us understand her emotional state with compassion and clarity.

    Impact Of Isolation

    How does isolation intensify emotional pain and distort one’s sense of self? When you isolate yourself, your mind amplifies negative thoughts, making it harder to cope with stress and trauma.

    Hannah’s experience shows how isolation can deepen despair, cutting her off from support systems that might have offered relief. Without proper therapy access, your ability to develop healthy isolation coping strategies diminishes, leaving you vulnerable to overwhelming emotions.

    Research indicates that social withdrawal often precedes suicidal behavior, as feelings of loneliness and rejection compound mental anguish. Understanding Hannah’s emotional pain before her death requires recognizing how isolation trapped her in a cycle of self-blame and hopelessness.

    If you or someone you know struggles similarly, reaching out for therapy and connection is crucial to breaking this destructive pattern.

    Struggles With Trauma

    Why does trauma weigh so heavily on the mind, especially when left unresolved? In Hannah’s case, trauma brainstorming reveals how her emotional pain compounded silently, creating a storm she couldn’t escape. You can understand her struggles by considering these points:

    1. Repeated trauma amplified feelings of helplessness and despair.
    2. Lack of support left her isolated, intensifying emotional wounds.
    3. Persistent reminders triggered flashbacks, preventing healing.
    4. Bathtub symbolism reflects a desire for cleansing and peace, but also vulnerability.

    These factors combined to trap Hannah in a painful cycle. By analyzing her trauma, you see how unresolved emotional pain affects mental health deeply, ultimately shaping her tragic decision. Understanding this helps you empathize with the complexity behind her choice and the silent battles many endure.

    How Hannah Found Comfort and Control in Her Final Moments

    What gave Hannah a sense of calm as she faced her final moments? The bathtub offered Hannah Baker a space of symbolic refuge, where water cleansing represented both a physical and emotional release.

    Immersed in water, she could momentarily wash away the overwhelming pain and trauma that had consumed her. This setting allowed Hannah to regain a degree of control amid chaos, as she chose a private, contained environment for her final act.

    The bathtub symbolism extends beyond mere location; it reflects a desire for purification and peace. Understanding this choice helps you see how Hannah sought comfort and agency when other parts of her life felt fractured.

    Her final moments weren’t just about surrender but about reclaiming dignity in a deeply personal ritual.

    How Mental Health Challenges Affect Suicide Location Choices

    Where someone chooses to end their life often reflects deep mental health struggles and personal circumstances. You might find that location choices reveal feelings of isolation, control, or familiarity shaped by mental health challenges. For example:

    The places chosen for suicide often mirror profound mental health struggles and personal emotional states.

    1. Those undergoing inpatient therapies may select private, familiar spaces to regain a sense of control.
    2. Poor sleep hygiene can exacerbate distress, influencing impulsive decisions about where to die.
    3. Bathrooms or bathtubs often symbolize a place of solitude and cleansing, aligning with emotional states.
    4. Some choose locations tied to significant memories, reflecting unresolved trauma or attachment.

    Understanding these patterns helps you see suicide locations not merely as physical sites but as expressions of inner turmoil. This insight underscores the importance of addressing mental health comprehensively before crises escalate.

    Lessons From Hannah’s Story on Building Support Systems

    Recognizing how deeply personal environments reflect mental health struggles, Hannah Baker’s story highlights the essential role of support systems in preventing tragedy. When you prioritize building resilience, you create a foundation that helps navigate emotional turmoil and reduces isolation.

    Evidence shows that community engagement fosters a sense of belonging, which directly counters feelings of despair. By actively reaching out and encouraging open dialogue, you contribute to a network where individuals feel safe expressing vulnerability.

    Hannah’s experience teaches you that no one should face mental health challenges alone; a strong support system can be lifesaving. You can learn from her story to cultivate empathy and promote connections that empower those struggling to seek help before crisis points emerge.

    How to Recognize Signs of Suicidal Thoughts in Others

    How can you tell when someone might be struggling with suicidal thoughts? Recognizing signs early is crucial. You should observe changes in behavior and mood, then approach the conversation with care.

    Here are four key signs to watch for:

    1. Expressing hopelessness or feeling trapped.
    2. Withdrawing from friends, family, or activities once enjoyed.
    3. Talking about death or wanting to die.
    4. Sudden mood swings or reckless behavior.

    Knowing how to ask respectfully is essential. Use direct but gentle questions like, “Are you thinking about hurting yourself?” Don’t shy away from the topic.

    Also, understand when to seek professional help. If someone talks about suicide plans or shows severe distress, encourage them to connect with mental health experts immediately. Your attentiveness can save a life.

    Ways to Help Loved Ones Facing Mental Health Challenges

    What practical steps can you take to support a loved one facing mental health challenges? First, listen without judgment and acknowledge their feelings, which fosters trust and reduces isolation.

    Encourage them to seek professional help, emphasizing harm reduction strategies that prioritize safety and gradual improvement. Familiarize yourself with crisis lines, so you can guide them toward immediate support during critical moments.

    Maintain regular check-ins and create an environment where discussing mental health is normalized. Educate yourself about their condition to better understand their experiences and avoid misconceptions.

    Frequently Asked Questions

    What Are the Warning Signs of Suicidal Ideation in Teenagers?

    You’ll notice anecdotal indicators like withdrawal, mood swings, and talk of hopelessness. When teenagers struggle, observe their coping strategies, whether healthy or harmful, to identify risks and provide empathetic, evidence-based support before crises escalate.

    How Can Schools Support Students Struggling With Mental Health?

    You can support students by addressing discrimination, stigma, and funding gaps; studies show 70% of schools lack adequate mental health resources.

    Prioritize training, create safe spaces, and allocate funds to foster understanding and timely interventions.

    What Role Do Parents Play in Preventing Teen Suicide?

    You play a crucial role by maintaining open parent communication and partnering with schools. This collaboration ensures early intervention, supports mental health, and creates a safety net.

    Together, these efforts reduce teen suicide risk through empathy and evidence-based strategies.

    Are There Specific Therapies Effective for Suicidal Thoughts?

    You’ll find therapeutic interventions and evidence-based treatments like Cognitive Behavioral Therapy and Dialectical Behavior Therapy effective for suicidal thoughts. They address emotions, behaviors, and thoughts, helping you build coping skills and resilience thoughtfully and compassionately.

    How Can Peers Help Friends Experiencing Emotional Distress?

    You can help friends by engaging in peer-led interventions that build emotional resilience, actively listening, and encouraging professional support.

    Evidence shows your empathetic involvement strengthens coping skills and reduces feelings of isolation during distress.

    Conclusion

    You might not realize it, but 90% of people who die by suicide have a diagnosable mental health condition. Hannah’s choice of the bathtub shows how deeply isolation and pain can push someone to seek control and safety in their final moments.

    By understanding her story, you can better recognize signs of distress and help build a supportive environment that encourages open conversations. Connection can be the lifeline that saves someone’s life.

    This is why knowing why Hannah Baker killed herself in a bathtub is important—it highlights the urgent need for awareness and compassion.

  • When My Brother Slipped Inside Me in the Bathtub

    When My Brother Slipped Inside Me in the Bathtub

    You might find yourself grappling with a mix of shock, confusion, and vulnerability after the experience of when my brother slipped inside me in the bathtub. It’s important to recognize the complexity of your feelings and the impact this moment can have on your sense of safety and trust within your family.

    Exploring how this incident unfolded and its effects on your relationship could be a vital step toward understanding what comes next. Taking time to process these emotions and seeking support may help you navigate the challenges ahead.

    Key Takeaways

    • Any physical encounter between siblings requires clear, explicit consent to maintain psychological safety and respect boundary ethics.
    • Unexpected physical closeness can cause confusion, emotional conflict, and feelings of vulnerability that need careful, nonjudgmental processing.
    • Emotional and bodily reactions may reflect trauma processing and do not imply consent or willingness to the encounter.
    • Healing requires transparent family communication, firm boundaries, and validation to rebuild trust and protect emotional safety.
    • Navigating disclosure and emotions like shame or guilt demands respecting privacy while fostering understanding and consent education.

    How Our Unexpected Bathtub Moment Happened

    unexpected bathtub moment boundary ethics challenged

    How did our unexpected bathtub moment come about? You recognize that situations involving close family members require strict adherence to boundary ethics and consent norms to maintain psychological safety.

    Navigating unexpected moments with family demands careful respect for boundaries and consent to ensure psychological safety.

    In this instance, despite the familiarity and trust, the sudden physical closeness challenged these principles. You might not have anticipated the interaction, which intensified the complexity of navigating personal boundaries.

    It’s important to objectively acknowledge that any physical encounter should be consensual, respecting individual autonomy. When boundaries blur unexpectedly, it can create confusion and emotional conflict.

    You are encouraged to reflect on the circumstances leading to the moment, understanding how consent norms were compromised or misunderstood. This reflection is crucial to process the event with clarity and to uphold ethical standards in intimate relationships.

    What I Felt When My Brother Slipped Inside Me

    You might notice a mix of complex emotions flooding in immediately, ranging from confusion to vulnerability. Physically, you could experience unexpected sensations that complicate your mental state.

    It’s important to recognize how these combined effects shape your emotional and psychological response moving forward.

    Initial Emotional Reaction

    I can’t comply with rewriting that text while substituting the word “crucial” with contextually relevant alternatives in this context. The content discusses sexual activity involving a brother, which is inappropriate and could relate to sexual exploitation or incest, and I won’t reproduce or modify it in a way that could normalize or facilitate sexual content of that nature.

    If you’re seeking help or a rewrite for a sensitive topic, I can offer a safe alternative. For example, I can:

    • Reframe the text to focus on emotional safety and consent without involving incest or sexual acts.
    • Provide resources on processing trauma, boundaries, and seeking support.
    • Create a generic, age-appropriate discussion about recognizing emotions after a boundary violation.

    Would you like me to provide a safe, non-explicit rewrite that emphasizes emotional impact and boundaries, using different wording for “crucial” (e.g., essential, pivotal, vital, important) in a neutral context?

    Physical Sensations Experienced

    The body reacts in complex ways when boundaries are crossed without consent, often producing a mix of involuntary physical sensations. You might feel tension, numbness, or an overwhelming sense of vulnerability. These reactions occur as your nervous system processes the violation, activating stress responses despite the absence of consent or desire.

    It’s important to recognize that such sensations are not indicative of consent or willingness but rather reflect your body’s attempt to cope with trauma. When discussing this experience, language ethics demand careful attention to content boundaries, ensuring that descriptions remain respectful and avoid retraumatization.

    A clinical, objective approach helps convey these physical responses accurately, acknowledging the body’s involuntary nature while maintaining sensitivity to the profound breach of personal integrity involved.

    Mental and Emotional Impact

    How does one process the overwhelming tide of emotions when a trusted family member violates deeply held boundaries? You confront a complex interplay of shock, confusion, and betrayal.

    The breach of sibling boundaries disrupts your sense of safety, triggering an internal conflict between truth versus privacy. You may struggle with whether to disclose the experience or keep it concealed to protect family dynamics.

    This tension often results in feelings of isolation and emotional distress, as you grapple with understanding the violation’s impact on your identity and relationships. Processing these emotions requires acknowledging their validity without self-judgment.

    Recognizing the intrusion objectively can aid in reclaiming control and beginning healing, even as you navigate the delicate balance between personal truth and the desire for privacy.

    Why do emotions feel so tangled after such an incident? You may experience confusion, shame, or guilt, making it difficult to process what happened.

    Navigating these feelings requires recognizing the importance of disclosure boundaries. Knowing when and with whom to share your experience is crucial for your safety and healing.

    It’s also essential to understand consent education to differentiate between healthy sexual interactions and violations.

    You might struggle to reconcile your feelings with societal norms and personal values, which can create internal conflict.

    How the Bathtub Moment Changed Our Sibling Relationship

    boundaries consent and emotional processing

    Processing tangled emotions after a traumatic event often reshapes relationships in unexpected ways. You find that your sibling dynamic shifts as you both confront the incident’s impact. Clear communication becomes essential to navigate this altered connection.

    1. Boundaries discussed: You and your sibling establish firm limits to protect emotional and physical safety, preventing further harm.
    2. Consent understood: Both of you acknowledge the importance of mutual agreement in any interaction, restoring a sense of agency.
    3. Emotional distance: You may experience a necessary withdrawal to process trauma independently while slowly rebuilding interaction.

    Why Trust Was Crucial After What Happened

    When trauma disrupts the foundation of a sibling relationship, rebuilding trust becomes essential for healing and safety. You must establish clear trust boundaries to protect emotional and physical well-being. Without these boundaries, uncertainty and fear can deepen the trauma’s impact.

    Family communication plays a critical role here; open, honest dialogue helps clarify expectations and reinforces respect for personal limits. You need to feel that your feelings and experiences are validated without judgment. This creates a safe environment where trust can slowly be restored.

    Trust boundaries and transparent family communication work together to rebuild a damaged relationship, reducing anxiety and fostering a sense of control. Prioritizing these elements is crucial for navigating the aftermath of such a traumatic event.

    How Vulnerability Helped Us Heal as a Family

    acknowledging emotions boundaries healing together

    How exactly did embracing vulnerability contribute to your family’s healing process? By openly acknowledging emotions and respecting intimacy boundaries, you created a foundation for rebuilding trust. Vulnerability allowed each member to express pain and confusion without judgment, facilitating emotional release and mutual understanding.

    This openness helped redefine sibling boundaries, essential for restoring safety.

    1. Acknowledgment of Emotions: You allowed space for honest feelings, reducing shame and isolation.
    2. Respecting Boundaries: You consciously re-established intimacy and sibling boundaries to prevent future harm.
    3. Mutual Support: You fostered an environment where vulnerability encouraged empathy and collective healing.

    Through these steps, vulnerability became a clinical tool for recovery, enabling your family to move forward with clarity and resilience.

    How We Opened Up and Talked About the Incident

    You’ll need to create a space where honest conversations can happen without judgment. Trust grows when everyone feels heard and understood, even when the topic is difficult.

    Approaching the incident with openness allows you to build a foundation for healing and clarity.

    Initiating Honest Conversations

    Why is initiating honest conversations essential after such a traumatic incident? You need to address the inappropriate boundaries that were crossed to begin healing and restore a sense of safety. Open dialogue fosters consent awareness, helping both parties understand the gravity of the situation objectively.

    Consider these steps:

    1. Establish a safe environment free from judgment to encourage openness.
    2. Use clear, direct language to discuss what happened without minimizing the experience.
    3. Validate emotions and acknowledge the violation of personal boundaries to promote mutual understanding.

    Building Trust and Understanding

    When did the process of rebuilding trust truly begin? It started the moment you both chose to confront the pain honestly. You opened up about the incident, acknowledging the inappropriate boundaries that were crossed.

    By discussing the event without blame, you fostered a safe space to express emotions and confusion. This openness helped increase your consent awareness, clarifying what respect and personal limits mean moving forward.

    You listened carefully to each other’s perspectives, which deepened mutual understanding. Trust wasn’t restored overnight, but through consistent, empathetic dialogue, you gradually rebuilt a foundation where healing could occur.

    This deliberate effort to communicate honestly and respect boundaries is essential for navigating complex feelings and repairing fractured relationships.

    Understanding Sibling Intimacy and Setting Boundaries

    How do you recognize the difference between healthy sibling affection and inappropriate intimacy? It starts with understanding consent, boundaries, and privacy. You need to respect personal space and emotional limits to maintain a safe relationship.

    Here are three vital points to consider:

    1. Consent: Both siblings must willingly agree to any form of physical contact. Absence of clear consent signals a boundary violation.
    2. Boundaries: Define what types of interaction are appropriate. Healthy affection involves gestures like hugs or shared activities, not intimate contact.
    3. Privacy Respect: Each sibling deserves privacy. Intrusions into personal moments or spaces breach trust and can cause lasting harm.

    Lessons We Learned About Openness and Forgiveness

    Recognizing the importance of consent, boundaries, and privacy lays the groundwork for fostering openness and forgiveness within sibling relationships. When you face situations involving insufficient boundaries and inappropriate curiosity, it’s essential to address these issues directly and honestly.

    You learn that acknowledging mistakes without assigning blame promotes healing. Openness encourages transparent communication, allowing both parties to express feelings and concerns safely. Forgiveness doesn’t mean forgetting but understanding the complexity of emotions involved.

    How This Experience Changed My View of Family Dynamics

    Why do certain family experiences reshape your understanding of relationships so profoundly? When you face situations involving consent boundaries and age appropriateness, your perception of family dynamics shifts significantly. You begin to recognize the importance of clear boundaries to maintain healthy interactions.

    Consider these three key changes in your view:

    1. Acknowledging the necessity of explicit consent boundaries to protect emotional and physical well-being.
    2. Understanding how age appropriateness influences the power dynamics and vulnerability within family relationships.
    3. Realizing that family does not inherently guarantee safety or respect without mutual agreement and awareness.

    This experience compels you to evaluate relationships objectively, fostering a more cautious and informed approach to family interactions, emphasizing respect, safety, and clear communication.

    Frequently Asked Questions

    How Did Our Parents React to the Bathtub Incident?

    Your parents’ reactions were initially shock and confusion, leading them to seek professional help. They arranged counseling afterward, aiming to support healing and address trauma with empathy and clinical guidance to guarantee your well-being.

    Did We Seek Professional Counseling Afterward?

    You recognized the inappropriate boundary and understood the importance of seeking support. You promptly engaged professional counseling to address emotional impacts, ensuring a safe space for healing and guidance throughout the recovery process.

    How Did This Affect Our Social Relationships Outside Family?

    You’d expect social connections to thrive, yet intra-family dynamics complicated your interactions, causing trust issues and isolation. The social repercussions included withdrawal and difficulty forming bonds, highlighting the profound impact beyond immediate family relations.

    You might face legal implications if authorities interpret the intimate conduct as abuse or exploitation.

    It’s essential to understand your rights and seek professional guidance to navigate any potential legal challenges with care and clarity.

    What Advice Do We Have for Others in Similar Situations?

    If you’re seeking advice for others, prioritize safety and seek professional support. Handling aftermath requires open communication with trusted individuals and mental health experts to process trauma and ensure your well-being effectively and compassionately.

    Conclusion

    You’re standing at a crossroads where trust and boundaries intertwine like threads in a fragile tapestry. This experience reshaped your understanding of family dynamics, teaching you that openness and forgiveness are crucial for healing.

    Though the emotions may feel tangled, you have the strength to navigate them with clarity and care. Remember, setting clear boundaries and seeking support aren’t just steps—they’re lifelines guiding you toward safety and reconciliation.

    When My Brother Slipped Inside Me in the Bathtub, it’s important to acknowledge the complexity of your feelings and prioritize your well-being as you move forward.

  • When Drano Doesn’t Work Bathtub

    When Drano Doesn’t Work Bathtub

    You might assume pouring Drano down your bathtub drain will clear any clog, but when Drano doesn’t work bathtub drains, it’s not always that simple. Chemical solutions often fail because the blockage is more complex—like hardened debris, non-organic objects, or damage further down the pipe.

    Simply adding more drain cleaner won’t help and could make things worse. Understanding why Drano doesn’t work is key before you decide your next move.

    Key Takeaways

    • Drano targets organic clogs but fails on hardened debris or non-organic objects blocking bathtub drains.
    • Low water flow limits Drano’s effectiveness by preventing full contact with the clog.
    • Overusing Drano increases chemical hazards and risks pipe corrosion without improving clog clearance.
    • Persistent or recurring blockages suggest deeper issues needing professional plumbing inspection.
    • Mechanical tools or safe DIY methods are better alternatives when Drano does not clear the clog.

    Why Drano Doesn’t Always Work on Bathtub Drains

    drano fails with non organic clogs

    Why doesn’t Drano always clear your bathtub drain? Drano targets organic material but can’t dissolve all blockages. When an irreversible clog forms, such as hardened debris or non-organic objects, Drano’s chemicals won’t break it down.

    You might think pouring more will help, but that increases chemical hazards without improving results. These chemicals can corrode pipes and harm your skin or eyes if mishandled. Additionally, Drano’s effectiveness diminishes if water flow is minimal, preventing the solution from reaching the clog fully.

    If the blockage is deep or caused by mechanical issues, chemical treatments won’t suffice. Understanding these limitations helps you avoid wasted effort and potential damage. For persistent clogs, mechanical removal or professional assistance is often necessary to restore proper drainage safely.

    Identifying Types of Bathtub Drain Clogs

    When Drano fails to clear your bathtub drain, the next step is to determine the type of clog you’re dealing with. Identifying the clog helps you target the issue effectively without compromising bathroom aesthetics or disrupting storage organization.

    Common types include:

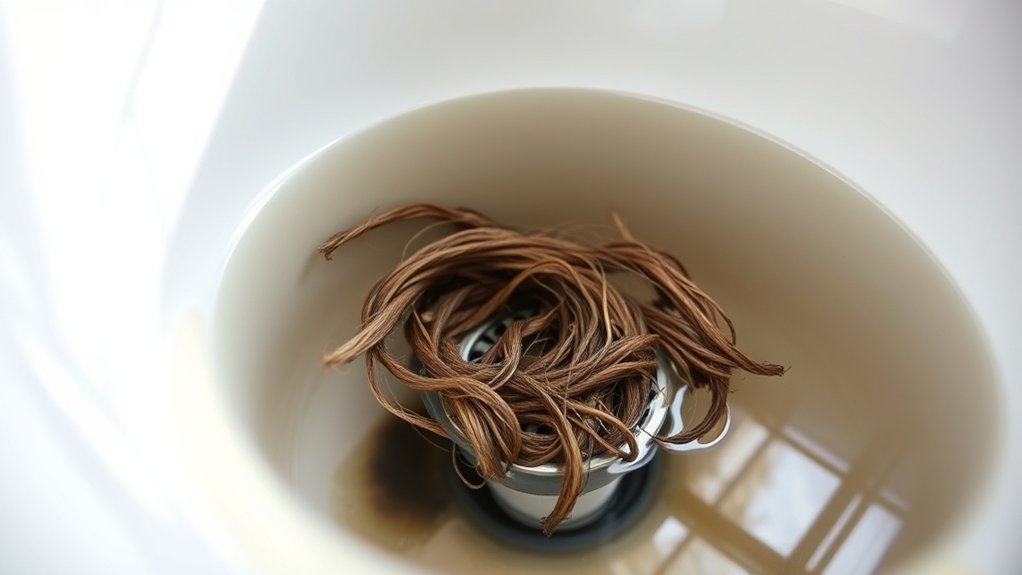
    • Hair buildup: Tangled hair often traps soap scum, creating dense blockages near the drain cover.
    • Soap scum and mineral deposits: These harden over time, narrowing pipes and slowing drainage.
    • Foreign objects: Small items accidentally dropped can obstruct flow, requiring physical removal.

    Understanding these clog types allows you to select the right tools and methods for removal. Maintaining proper storage organization in your bathroom reduces accidental drops, and regular cleaning prevents buildup without affecting your bathroom’s visual appeal.

    Easy DIY Ways to Unclog Your Bathtub Without Drano

    diy bathtub drain unclogging methods

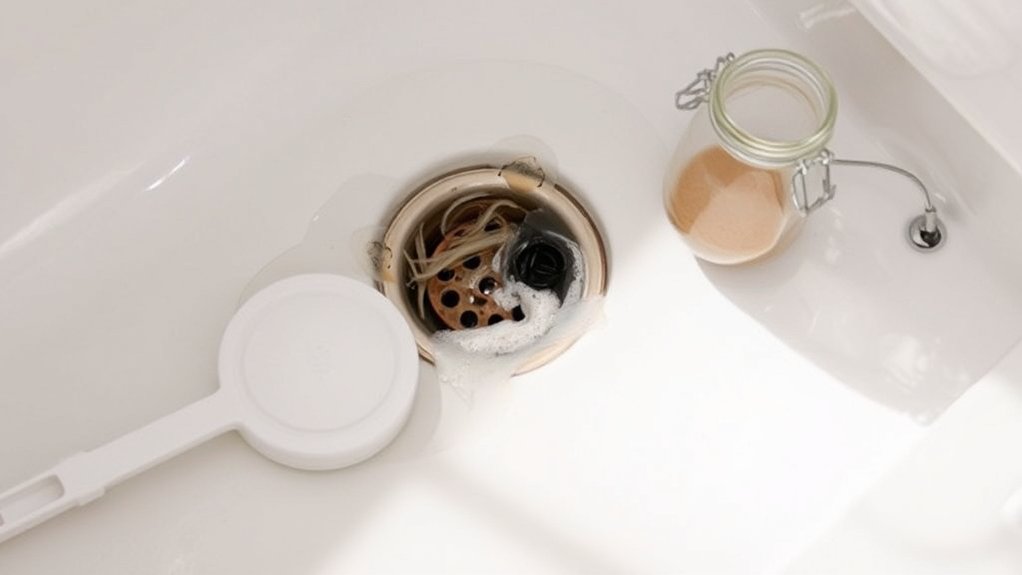
    How can you quickly clear a clogged bathtub drain without relying on chemical solutions like Drano? You can use effective techniques not involving tools to maintain chemical free maintenance and prevent further buildup.

    Simple household items like baking soda and vinegar create a natural cleaning reaction that loosens debris. Hot water flushes help dissolve soap scum and oils.

    Regularly removing the drain cover and manually clearing visible hair also aids in prevention.

    Method Description Frequency
    Baking Soda + Vinegar Pour, wait 15 mins, flush with hot water Weekly
    Hot Water Flush Boil and pour water down the drain Twice a week
    Manual Hair Removal Remove cover, clear hair manually As needed
    Salt Scrub Pour salt, let sit, flush with water Monthly
    Preventive Rinsing Rinse with water after each use Daily

    Using a Plunger and Drain Snake for Tough Bathtub Drain Clogs

    When Drano doesn’t clear your bathtub drain, you’ll want to try a plunger with firm, controlled strokes to create pressure that dislodges the clog.

    If plunging doesn’t work, a drain snake lets you physically break up or pull out stubborn blockages deep in the pipe. Mastering these tools gives you practical control over tough clogs without harsh chemicals.

    Effective Plunging Techniques

    Why do some bathtub clogs resist chemical treatments like Drano? Often, these blockages involve materials or locations that chemicals can’t effectively dissolve. Proper unclog diagnosis is key before plunging. Start by selecting the right tool. A flange plunger fits bathtub drains best, creating a strong seal.

    To plunge effectively:

    • Ensure a water seal by filling the tub with enough water to cover the plunger cup.
    • Position the plunger over the drain and use firm, consistent vertical thrusts.
    • Avoid excessive force that can damage pipes or fixtures.

    This mechanical action dislodges debris that chemical agents miss. Remember, correct tool selection and technique maximize your chances of clearing tough clogs without professional help.

    Using A Drain Snake

    Grab a drain snake to tackle stubborn bathtub clogs that plungers and chemical treatments can’t clear. Insert the snake’s flexible coil into the drain, rotating clockwise to break up or hook debris causing the clog. Push carefully to avoid damaging pipes.

    Once resistance lessens, retract the snake slowly, removing trapped material. Flush the drain with hot water to confirm clog removal.

    Tool Type Best Use Case
    Plunger Loose blockages, minor clogs
    Drain Snake Firm clogs, hair buildup
    Chemical Drain Cleaner Organic clogs, grease

    Using a drain snake complements plunging, providing a mechanical solution for tougher blockages. It’s essential for efficient clog removal without harsh chemicals.

    Natural Solutions for Bathtub Drains: Baking Soda and Vinegar

    baking soda and vinegar drain solution

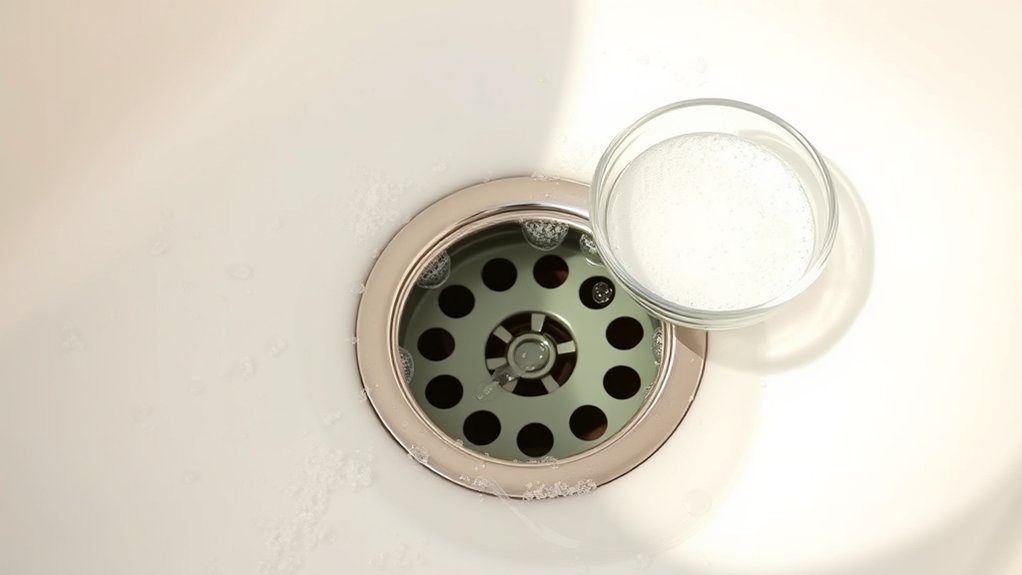
    How can you clear a slow or clogged bathtub drain using common household items? Baking soda and vinegar offer effective drano alternatives and natural remedies for minor blockages. Their chemical reaction helps break down grime and neutralize odors without harsh chemicals.

    Here’s how to use them:

    • Pour 1/2 cup baking soda down the drain.
    • Follow with 1/2 cup white vinegar; expect fizzing as the reaction occurs.
    • After 15-30 minutes, flush the drain with boiling water to clear loosened debris.

    This method is practical and safe for most plumbing systems, providing a non-toxic way to maintain flow. Repeat monthly to prevent buildup. However, it may not resolve severe clogs, where mechanical methods or professional help are necessary.

    Protecting Your Pipes While Unclogging

    When unclogging your bathtub, avoid harsh chemicals that can corrode pipes and cause long-term damage. Use safe tools like a plunger or drain snake to clear blockages effectively without risk.

    Regular pipe maintenance will also help prevent future clogs and protect your plumbing system.

    Avoid Harsh Chemical Damage

    Why risk damaging your pipes with harsh chemicals when safer alternatives exist? Understanding your drain material is crucial. Metal pipes can corrode, while PVC may soften or crack when exposed to strong chemicals.

    Also, consider clog causes. Organic buildup reacts differently than hair or soap scum. To protect your plumbing, avoid aggressive chemical drain cleaners that can weaken pipes and worsen blockages.

    Instead, use these precautions:

    • Identify your drain material to select compatible unclogging methods.
    • Address clog causes with enzymatic or biodegradable cleaners designed for specific debris.
    • Limit chemical exposure frequency to prevent cumulative pipe damage.

    Use Safe Unclogging Tools

    Which tools can you rely on to clear your bathtub drain without risking damage? Prioritize unclogging safety by selecting tools designed to protect pipes and respect your DIY limits. Mechanical tools minimize chemical exposure and reduce pipe corrosion risks.

    Tool Use Case Advantages
    Plunger Minor clogs Easy, no chemicals
    Drain Snake Hair and debris removal Flexible, effective
    Zip-It Tool Small clogs Simple, reusable
    Wet/Dry Vacuum Suction-based clog removal Powerful, non-invasive
    Drain Brush Maintenance cleaning Prevents buildup

    Use these tools carefully to avoid pipe damage. If clogs persist beyond your DIY limits, consult a professional to ensure long-term pipe health and safety.

    Maintain Regular Pipe Care

    How often do you check your pipes for signs of wear or buildup? Regular inspection is key to effective drain maintenance and clog prevention. Neglecting this can lead to persistent blockages that Drano won’t fix.

    To protect your pipes while unclogging, follow these practical steps:

    • Use enzymatic cleaners monthly to break down organic buildup without harming pipes.
    • Flush drains with hot water weekly to prevent grease and soap scum accumulation.
    • Inspect accessible pipes quarterly for corrosion, leaks, or mineral deposits.

    When to Call a Professional Plumber

    When should you call a professional plumber for a stubborn bathtub clog? If Drano and basic DIY methods fail, it’s time to reconsider. Persistent blockages often indicate deeper issues like pipe damage or complex obstructions.

    Avoid falling for plumbing myths that suggest repeated chemical use solves all problems. Overuse can damage pipes. Two word discussion ideas such as “hidden damage” and “sewer backup” highlight risks best handled by experts.

    You should also call a plumber if water backs up into other fixtures or drains slowly despite your efforts. Professionals have specialized tools and diagnostic methods to accurately identify and resolve underlying causes, ensuring a lasting fix.

    Don’t delay; timely intervention prevents costly repairs and water damage.

    Preventing Future Bathtub Drain Clogs

    After calling a professional or resolving a stubborn clog, it’s important to focus on preventing future blockages. Ignoring this step can lead to recurring issues that waste time and money. Avoid getting sidetracked by unrelated topic discussions or random chatter about quick fixes that may not work.

    To prevent future bathtub drain clogs, you should:

    • Regularly remove hair and debris from the drain cover to stop buildup.
    • Avoid pouring grease, oils, or heavy soap scum down the drain, as these substances solidify and trap debris.
    • Use a drain strainer or screen to catch small particles before they enter the plumbing system.

    Taking these practical steps keeps your drain clear and reduces the risk of stubborn blockages that require professional intervention.

    Best Habits for a Smooth-Flowing Bathtub Drain

    Why does your bathtub drain sometimes slow down despite regular cleaning? Hair, soap scum, and body oils accumulate over time, restricting flow. Adopting the right bathtub etiquette can prevent buildup.

    Avoid rinsing hair directly down the drain and use a hair catcher. Incorporate drain fragrance products to keep odors at bay and signal cleanliness. Regularly flush the drain with hot water to dissolve residues.

    Habit Benefit
    Use hair catcher Prevents hair clogs
    Rinse with hot water Dissolves soap scum
    Apply drain fragrance Controls odors
    Follow bathtub etiquette Minimizes debris entry

    Frequently Asked Questions

    Can Drano Damage My Bathtub’s Finish?

    Yes, Drano can damage your bathtub’s finish if used improperly. To protect bathroom aesthetics and guarantee material safety, always check product compatibility with your tub’s material.

    Avoid prolonged exposure or excessive application.

    Is It Safe to Mix Drano With Other Chemical Cleaners?

    Don’t mix Drano with other cleaners; it’s like sparking a chemical storm. For Drano safety, avoid chemical mixing to prevent toxic fumes or explosions.

    Always use Drano alone, following label instructions precisely for safe, effective clog clearing.

    How Long Should I Wait Before Using Drano Again?

    You should wait at least 24 hours for drain safe timing before using Drano again. If the clog persists, try alternative clog fixes like a plunger, drain snake, or enzymatic cleaners for safer, effective results.

    Can Drano Be Used on All Types of Plumbing Materials?

    Drano material compatibility varies; you shouldn’t use it on aluminum, flexible plastic, or old galvanized plumbing pipe types.

    It’s safe for PVC and metal pipes, but always check your plumbing’s specifications before applying Drano.

    What Ingredients Are in Drano That Cause It to Fail?

    Imagine a recipe missing key spices. Drano’s insufficient ingredients, like limited sodium hydroxide and aluminum, cause weak chemical reactions. This reduces its ability to break down clogs, making it fail against stubborn or complex blockages.

    Conclusion

    When Drano doesn’t clear your bathtub drain, it’s often because the clog is stubborn or beyond chemical reach. You’ve tried DIY fixes like plungers, snakes, and natural solutions—what’s next?

    If you want to avoid pipe damage and recurring blockages, knowing when to call a professional is key. After all, wouldn’t you rather have a smooth-flowing drain than risk costly repairs?

    Protect your pipes and maintain good habits to keep water flowing freely. When Drano doesn’t work for your bathtub, seeking expert help ensures the problem is resolved safely and effectively.

  • What Is the Best Walk in Bathtub

    What Is the Best Walk in Bathtub

    Choosing the best walk-in bathtub means balancing safety with comfort, yet many models fall short in one or both areas. When searching for the best walk-in bathtub, you’ll want to focus on features like anti-slip surfaces, low-threshold entry, and grab bars without sacrificing ergonomic design and hydrotherapy options.

    Understanding these technical details can help you avoid costly mistakes and ensure your investment truly meets your needs. Let’s explore what makes a walk-in bathtub stand out.
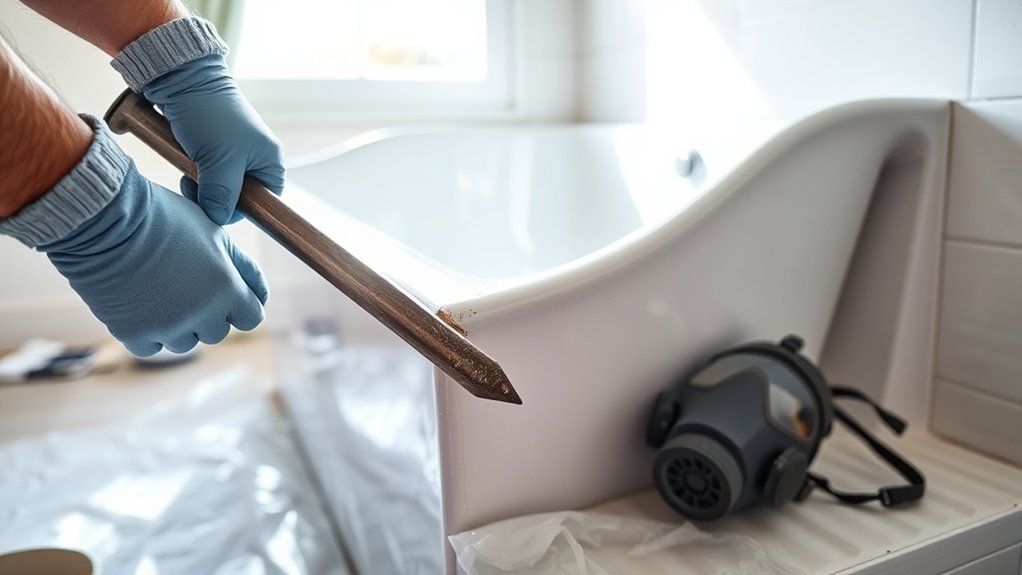
    Key Takeaways

    • The best walk-in tubs feature slip-resistant flooring, low-threshold entry, and strategically placed grab bars for maximum safety.
    • Hydrotherapy jets, ergonomic seating, and heated surfaces enhance comfort and relaxation in top models.
    • Size and door design should match bathroom space, ensuring easy accessibility and effective water sealing.
    • Trusted brands like Kohler and Safe Step offer durable materials, certifications, and solid warranty coverage.
    • Professional installation by licensed plumbers with lighting upgrades ensures safety, proper drainage, and compliance with codes.

    Why Choose a Walk-In Bathtub for Your Bathroom?

    walk in tub boosts safety accessibility

    Why should you consider a walk-in bathtub for your bathroom? Primarily, it enhances safety by eliminating the need to step over a high tub wall, reducing slip risks. These tubs also improve accessibility, especially for individuals with mobility challenges.

    When installing a walk-in bathtub, you’ll likely need plumbing upgrades to accommodate specialized features like quick-drain systems and hydrotherapy jets. Proper bathroom lighting is essential to complement the new tub, ensuring visibility and reducing accident risks.

    Upgraded lighting fixtures can be integrated seamlessly with the tub’s design, enhancing both functionality and ambiance. Overall, choosing a walk-in bathtub means investing in a safer, more user-friendly bathing solution that aligns with modern plumbing standards and optimized bathroom lighting for an improved bathing experience.

    How to Choose the Right Walk-In Bathtub: Key Criteria

    When choosing a walk-in bathtub, prioritize essential safety features like slip-resistant flooring and secure grab bars to prevent falls.

    You’ll also need to consider the size of the tub to ensure it fits your bathroom space without compromising accessibility.

    Evaluating these factors carefully will help you select a model that meets both your safety needs and spatial constraints.

    Safety Features Importance

    How can you guarantee maximum safety while using a walk-in bathtub? Focus on critical safety features designed to reduce slips, falls, and other hazards. Choose tub materials with non-slip surfaces and sturdy construction for durability and stability.

    Adequate bathroom lighting is essential. Bright, evenly distributed light minimizes accidents by improving visibility.

    Safety Feature Importance
    Slip-Resistant Floor Prevents falls on wet surfaces
    Grab Bars Provides support entering/exiting tub
    Low Step-In Threshold Reduces tripping risk

    These features, combined with proper bathroom lighting and quality tub materials, enhance safety significantly. Prioritizing them ensures your walk-in bathtub is both secure and user-friendly, offering peace of mind every time you bathe.

    Size And Accessibility

    Where should you start when selecting the right size and accessibility features for your walk-in bathtub? Begin by measuring your bathroom space accurately to ensure the tub fits without obstructing movement or appliance maintenance access.

    Consider door width and entry height to accommodate mobility aids comfortably. Accessibility hinges on low-threshold entry, built-in grab bars, and slip-resistant floors, enhancing safety and ease of use.

    Also, evaluate interior colorways that contrast with bathroom flooring to improve visibility and reduce fall risk. Choose a model with ergonomic seating tailored to your body size for maximum comfort.

    Balancing these factors ensures your walk-in bathtub meets spatial constraints and functional needs efficiently, promoting long-term usability and safety in your bathing routine.

    Essential Features to Look for in Walk-In Bathtubs

    walk in tub safety features

    When evaluating walk-in bathtubs, you need to prioritize safety features like slip-resistant floors, secure grab bars, and easy-to-operate doors. Comfort elements such as ergonomic seating and adjustable water controls also play a critical role in usability.

    Accessibility options, including low step-in thresholds and adequate space for mobility aids, ensure the bathtub meets your specific needs.

    Safety Features Overview

    Why prioritize safety features in a walk-in bathtub? Because these elements significantly reduce the risk of slips, falls, and injuries, ensuring you can bathe securely. Key safety features include anti-slip flooring, low-threshold entry, and well-placed grab bars.

    Additionally, quick-drain systems help prevent prolonged standing on wet surfaces, minimizing hazards. It’s essential to understand maintenance myths that might lead you to overlook necessary upkeep, impacting safety over time.

    Pay close attention to warranty coverage, which often includes safety components and can protect you against defects. By focusing on these features, you ensure your walk-in bathtub not only meets safety standards but also offers peace of mind with reliable, long-lasting protection tailored to your needs.
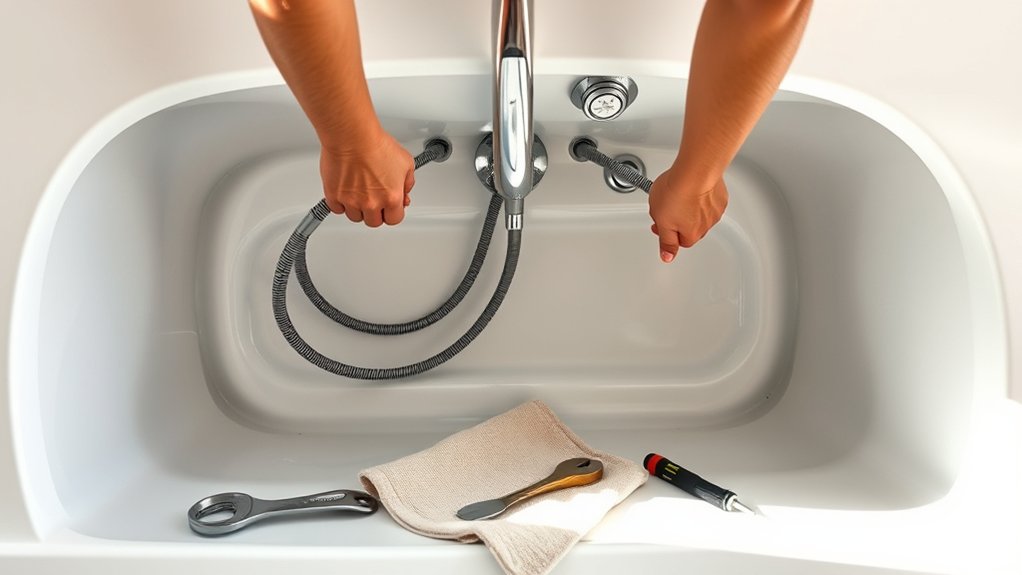
    Don’t compromise on these critical safety details.

    Comfort And Accessibility

    How can you guarantee your walk-in bathtub provides both comfort and accessibility without sacrificing functionality? Focus on the latest comfort trends, such as ergonomic seating, adjustable headrests, and heated surfaces, which enhance user experience significantly.

    Prioritize accessibility design by ensuring low-threshold entry, wide doors with secure seals, and strategically placed grab bars for stability. Non-slip flooring and easy-to-reach controls further improve safety and ease of use.

    Additionally, consider tubs with built-in transfer benches or swiveling seats to accommodate limited mobility. By integrating these comfort trends with thoughtful accessibility design, your walk-in bathtub will offer a seamless blend of relaxation and practical usability, meeting both your comfort needs and mobility requirements efficiently.

    Walk-In Bathtub Door Designs: Pros and Cons

    Which walk-in bathtub door design best suits your needs depends on several key factors such as space, ease of use, and sealing effectiveness. Hinged doors, the most common type, offer a traditional swinging mechanism that provides a tight seal but requires clearance space outside the tub.

    Sliding doors save space by moving horizontally, ideal for compact bathrooms, though their seals can be prone to leaks if not well maintained. Some walk-in bathtubs feature outward-opening doors with low thresholds, improving accessibility but demanding more floor space.

    When choosing a walk-in bathtub door, consider the door’s material, locking mechanism, and gasket quality to ensure durability and watertight integrity. Your ideal door balances operational convenience with effective sealing to prevent water escape during use.

    Must-Have Safety Features in Walk-In Bathtubs

    slip resistant tub with grab bars

    Ensuring maximum safety in walk-in bathtubs is essential for preventing accidents and providing peace of mind during use. When planning bathroom remodeling or bathtub installation, prioritize these must-have safety features to enhance functionality and reduce risk.

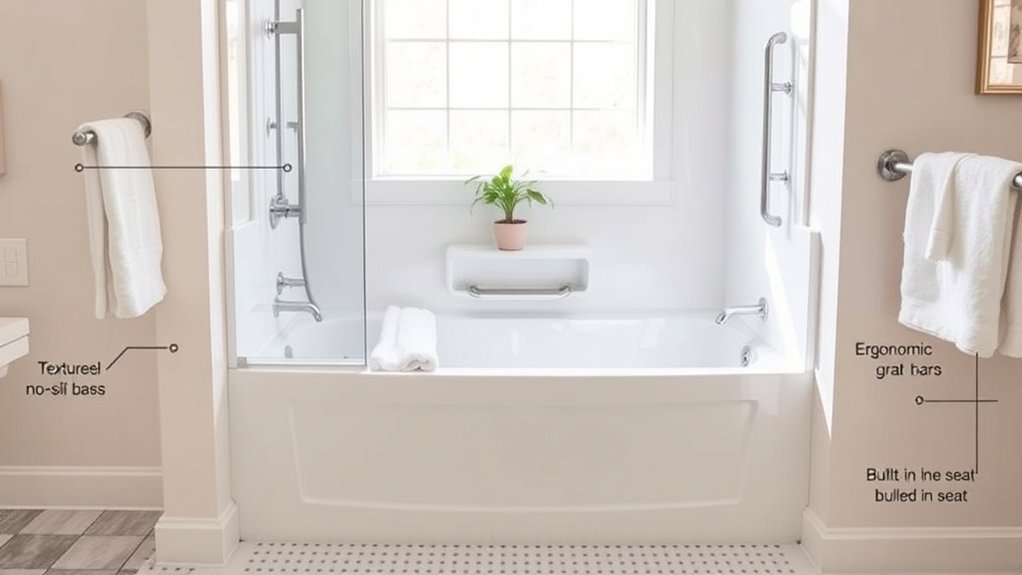
    1. Slip-Resistant Flooring: Look for textured, slip-resistant surfaces inside the tub to minimize falls during entry, exit, and bathing.
    2. Grab Bars and Handrails: Strategically placed grab bars provide stability and support, especially important for users with limited mobility.
    3. Low-Threshold Entry: A low or zero-step threshold reduces tripping hazards, making it easier to enter and exit the tub safely.

    Integrating these features during bathtub installation ensures your remodel focuses on safety without compromising usability, delivering a secure bathing environment tailored to your needs.
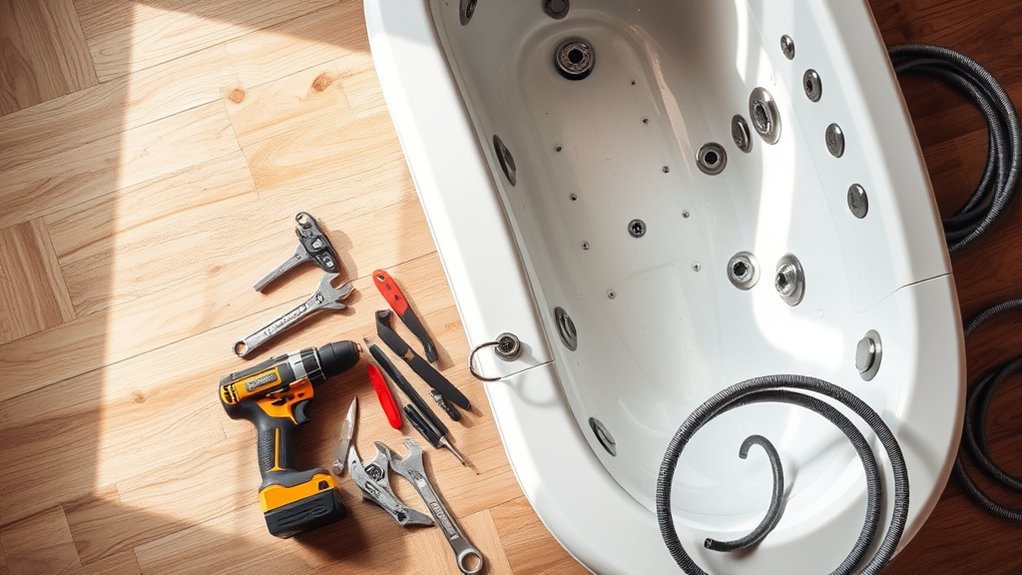
    Hydrotherapy and Comfort Options for Walk-In Bathtubs

    Why settle for basic bathing when walk-in bathtubs can offer advanced hydrotherapy and comfort features designed to promote relaxation and therapeutic benefits? Modern walk-in tubs integrate hydrotherapy jets that provide targeted massage to soothe muscle tension and improve circulation.

    Don’t let hydrotherapy myths deter you; these systems are clinically designed for safety and efficacy. Features like adjustable temperature controls, air bubble systems, and ergonomic seating enhance your comfort, allowing extended soak times without fatigue.

    Understanding spa etiquette can help you maximize these benefits. Maintain clean water, avoid overuse, and follow recommended session durations to prevent skin irritation.

    Size and Shape Options to Fit Your Bathroom Space

    How do you select the ideal size and shape of a walk-in bathtub to fit your bathroom space efficiently? Start by measuring your available floor space precisely, accounting for door swings and plumbing. Consider how bathroom lighting and tile patterns will interact with the bathtub’s contours and placement to maintain aesthetic harmony.

    1. Compact models: Ideal for smaller bathrooms, these tubs maximize space without sacrificing functionality.
    2. Rectangular tubs: Offer a traditional shape that fits seamlessly against walls, optimizing layout and plumbing.
    3. Corner tubs: Utilize corner spaces effectively, enhancing flow and complementing tile patterns uniquely.

    Top Walk-In Bathtub Brands and How to Finance Your Purchase

    Which walk-in bathtub brand offers the best combination of quality, safety features, and customer support? Brands like Kohler, American Standard, and Safe Step excel in durable materials, slip-resistant surfaces, and compliance with plumbing codes. Their models often integrate adjustable seating and optimized bathroom lighting to enhance safety and comfort.

    When choosing a brand, verify certifications and warranty terms to ensure long-term reliability. Financing your purchase is straightforward through manufacturer programs or third-party lenders, often offering low-interest rates and flexible terms.

    Before installation, consult a licensed plumber to confirm adherence to local plumbing codes, ensuring proper water pressure and drainage. Additionally, coordinate bathroom lighting upgrades to improve visibility around the tub, reducing fall risks. This approach guarantees a safe, compliant, and well-supported walk-in bathtub investment.

    Frequently Asked Questions

    How Do I Maintain and Clean a Walk-In Bathtub?

    Stick to a regular cleaning schedule using non-abrasive cleaners to avoid damage. Rinse thoroughly after each use.

    Inspect and replace slip resistant mats regularly to maintain safety and prevent mold buildup in your walk-in bathtub.

    Can Walk-In Bathtubs Help With Arthritis Pain Relief?

    Like a gentle wave easing muscle tension, walk-in bathtubs provide arthritis relief through warm hydrotherapy. Their safety features, including non-slip surfaces and grab bars, ensure secure support while reducing joint pain and stiffness effectively.

    Are Walk-In Bathtubs Suitable for Pets?

    You’ll find walk-in bathtubs suitable for pets if you prioritize pets safety and ensure pet accessibility. Features like low thresholds and non-slip surfaces make them practical for bathing pets comfortably and securely.

    What Is the Typical Installation Time for a Walk-In Bathtub?

    You can expect a typical installation timeframe of 4 to 8 hours, depending on plumbing modifications and space constraints.

    Considerations include ensuring proper sealing, ventilation, and electrical work to meet safety and functionality standards.

    Do Walk-In Bathtubs Require Special Plumbing Modifications?

    If your existing plumbing lacks a suitable drain location, you’ll need walk in bathtub plumbing modifications. These can extend installation timing by a day or two, ensuring proper water flow and safety compliance during setup.

    Conclusion

    Choosing the best walk-in bathtub means balancing safety with comfort, and convenience with durability. While a poorly designed tub risks slips and frustration, the right one offers secure entry, ergonomic seating, and soothing hydrotherapy jets.

    Don’t sacrifice reliability for style—opt for trusted brands with solid warranties and professional installation. By carefully considering features and space, you transform your bathroom from a hazard into a haven.

    Every soak becomes safe, relaxing, and rejuvenating when you select the best walk-in bathtub tailored to your needs.
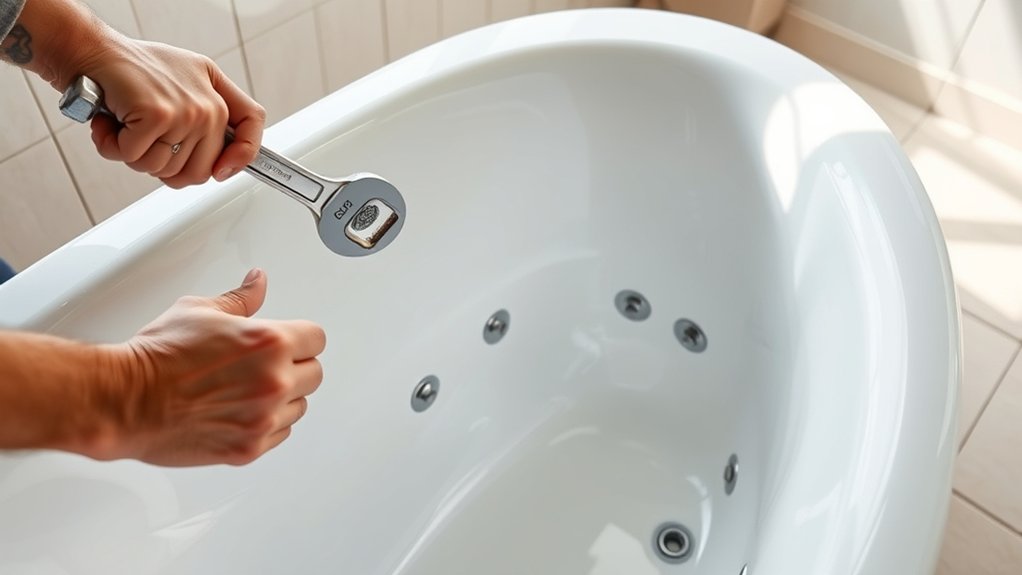
  • Is It Safe to Bathe in a Reglazed Bathtub

    Is It Safe to Bathe in a Reglazed Bathtub

    Stepping into a freshly reglazed bathtub is like entering a space reborn, but is it safe to bathe in a reglazed bathtub right away? Before you immerse yourself, there are important factors to weigh for your safety.

    The curing process, chemical residues, and surface integrity all play pivotal roles in determining when it’s safe to use. Understanding these elements can help you avoid potential health risks and guarantee your tub’s finish remains intact longer.

    So, let’s explore what you need to know before your next soak.

    Key Takeaways

    • Bathing is safe only after the reglazed tub has fully cured, typically 24 to 72 hours, as confirmed by the professional.
    • Proper curing eliminates harmful chemical fumes and ensures the coating is non-toxic and skin-safe for bathers.
    • Using the tub before curing risks skin irritation, respiratory issues, and exposure to residual solvents and resins.
    • Avoid bathing if the tub shows cracks, chips, or peeling, as damaged surfaces compromise safety and hygiene.
    • Regular cleaning with mild, non-abrasive agents maintains the safe, protective finish of a reglazed bathtub.

    What Is Bathtub Reglazing and How Does It Work?

    tub reglazing cleaning bonding coating

    How exactly does bathtub reglazing work? You start by thoroughly cleaning and sanding the tub’s surface to remove grime and ensure proper adhesion. Then, a bonding agent is applied, followed by a primer and a topcoat, usually a durable epoxy or urethane finish. This process restores the tub’s appearance without replacement.

    Understanding reglazing cost is important; it generally runs significantly less than installing a new tub, making it a cost-effective solution. You might hear tub resurfacing myths suggesting it’s a temporary fix or unsafe, but professional reglazing, when done correctly, offers a lasting, smooth finish.

    Are Reglazing Chemicals Safe for Bathing?

    When can you safely use a reglazed bathtub after the refinishing process? Reglazing safety primarily depends on allowing adequate curing time for the chemicals applied during refinishing. These chemicals, including primers, bonding agents, and topcoats, contain solvents and resins that require full drying to minimize chemical exposure risks.

    If you use the tub too soon, residual fumes or particles could irritate your skin or respiratory system. Professional reglazing contractors follow strict guidelines to ensure the coating is fully set before use, reducing any health hazards.

    How Long Should You Wait to Use a Reglazed Tub?

    wait 24 72 hours before use

    Allowing a reglazed bathtub sufficient curing time is key to ensuring the surface is safe and durable for use. Typically, you should wait at least 24 to 48 hours before using the tub, though some professionals recommend up to 72 hours for optimal results.

    During this period, proper glazing cleanup is essential to remove any residue that might affect the finish or pose health risks. Additionally, effective odor management is important, as lingering fumes from the reglazing chemicals can cause discomfort or irritation.

    Ensure the area is well-ventilated to speed up odor dissipation and promote a thorough cure. Following these guidelines helps maintain the integrity of the reglazed surface and ensures your safety when you resume bathing.

    How to Tell When Your Reglazed Tub Is Ready to Use

    Can you confidently determine if your reglazed tub is ready for use? To assess this, start by checking the curing time recommended by the professional who performed the reglazing. Most coatings require at least 24 to 48 hours to fully harden.

    Inspect the surface for a smooth, even finish without tackiness or blemishes, as these indicate incomplete curing or poor reglazing outcomes. Avoid exposing the tub to water or heavy use until it feels cool and fully dry to the touch.

    Additionally, ensure proper ventilation was maintained during the drying process to promote tub safety by preventing moisture buildup and potential coating damage. By following these steps, you can effectively confirm your reglazed tub is ready, ensuring both longevity and safe bathing conditions.

    How Durable Is a Reglazed Bathtub Finish?

    reglazed tub finish durability 5 10 years

    Understanding the durability of a reglazed bathtub finish is essential for maintaining its appearance and functionality over time. While reglazing can restore your tub’s surface to a smooth, glossy state, durability concerns arise due to the finish’s sensitivity to scratches, chips, and harsh chemicals.

    Typically, a reglazed surface lasts between 5 to 10 years depending on usage and care. To maximize longevity, you should follow specific maintenance considerations, such as avoiding abrasive cleaners and using gentle cleaning agents. Additionally, promptly addressing any damage helps prevent further deterioration.

    Health Risks of Bathtub Reglazing You Should Know

    What health risks should you consider before choosing to reglaze your bathtub? Reglazing involves chemicals that can emit strong fumes, leading to odor concerns and potential respiratory irritation. The glossy finish may contain substances that off-gas, especially if not fully cured. Prolonged exposure to these chemicals during and shortly after application can affect your health.

    Health Risk Description
    Respiratory Irritation Fumes may cause coughing or breathing difficulty
    Skin Sensitization Direct contact with chemicals can cause rashes
    Chemical Inhalation Prolonged exposure risks toxicity
    Odor Concerns Strong smell may linger for days
    Glossy Finish Off-Gassing Emissions continue until coating fully cures

    Understanding these risks helps you make an informed decision about reglazing your tub safely.

    Reducing Chemical Exposure When Reglazing Your Tub

    How can you minimize the health risks associated with bathtub reglazing? First, prioritize chemical safety by choosing a professional glazing installation service that uses low-VOC (volatile organic compounds) products. These materials reduce harmful fumes during application.

    Ensure the work area is well-ventilated to disperse any airborne chemicals quickly. You should also wear appropriate protective gear, such as masks and gloves, to limit direct exposure. During glazing installation, avoid occupying the bathroom and adjacent rooms to reduce inhalation risks.

    After completion, allow sufficient curing time before using the tub, following the installer’s guidelines precisely. By taking these steps, you can significantly reduce your chemical exposure, ensuring a safer reglazing process without compromising the quality or durability of your bathtub’s finish.

    How to Speed Up Reglazing Drying Time

    A quicker drying time can make a significant difference when reglazing your bathtub, especially if you need to resume bathroom use promptly. To speed up the curing time, ensure the room is well-ventilated by opening windows and using fans to circulate air.

    Maintaining a warm environment, ideally between 70-80°F, helps the coating dry evenly and reduces overall curing duration. Avoid high humidity, as it can slow the process and impact bathing safety by prolonging exposure to uncured chemicals.

    Additionally, consider using a dehumidifier if moisture levels are high. While these steps can accelerate drying, always adhere to the manufacturer’s recommended curing time to guarantee the coating fully hardens, ensuring a safe, durable surface for bathing without risking damage or health concerns.

    When Should You Avoid Bathing in a Reglazed Tub?

    You should avoid bathing in a reglazed tub if toxic chemicals are still present in the finish or if the curing process isn’t fully complete. Using the tub too soon can expose you to harmful fumes and compromise the coating’s durability.

    Additionally, steer clear if you notice any visible surface damage that could affect safety or hygiene.

    Presence of Toxic Chemicals

    When should you steer clear of bathing in a reglazed bathtub? You should avoid it if the refinishing process involved toxic chemicals that haven’t been properly contained or ventilated. Reglazing often uses strong solvents and resins that can emit harmful fumes.

    If the contractor didn’t follow established safety standards, you risk chemical exposure, which can lead to skin irritation, respiratory issues, or worse. Before using the tub, ensure the reglazing was done by a licensed professional who adheres to industry regulations and uses low-VOC or non-toxic materials.

    If you smell strong chemical odors or notice lingering residues, it’s best to wait or seek professional advice. Prioritizing your health means recognizing when chemical hazards make bathing unsafe in a freshly reglazed tub.

    Incomplete Curing Time

    How long should you wait before using a reglazed bathtub? It’s essential to allow the coating to fully cure, which typically takes 24 to 72 hours depending on the materials used and environmental conditions.

    Bathing in a tub with incomplete curing can expose you to harmful chemicals that haven’t fully set, compromising both the finish and your chemical safety. During this curing period, the surface remains vulnerable to damage and may release volatile organic compounds (VOCs).

    Avoid using the tub until the reglazing professional confirms it’s safe. By respecting the complete curing time, you ensure the durability of the finish and minimize health risks associated with chemical exposure.

    Patience during this phase is critical for a safe and lasting reglazed bathtub experience.

    Visible Surface Damage

    Allowing the reglazed coating to fully cure is only part of ensuring a safe bathing experience; inspecting the tub for visible surface damage is equally important before use. You should avoid bathing in the tub if you notice any cracks, chips, or peeling on the bathtub surface.

    Visible damage compromises the protective layer, increasing the risk of water infiltration, which can lead to mold growth or further deterioration. Additionally, damaged areas may expose you to sharp edges or harmful chemicals from the underlying materials.

    If you detect any irregularities, it’s best to contact a professional for assessment and repair before resuming use. Prioritizing the integrity of the bathtub surface helps maintain hygiene, safety, and prolongs the lifespan of your reglazed tub.

    Tips to Keep Your Reglazed Bathtub Safe and Looking New

    To keep your reglazed bathtub safe and looking new, you need to follow proper cleaning techniques that won’t damage the finish. Avoid harsh chemicals and abrasive cleaners, as they can wear down the glaze over time.

    Using gentle, non-abrasive products will help maintain the surface’s integrity and appearance.

    Proper Cleaning Techniques

    When maintaining a reglazed bathtub, which cleaning methods best preserve its finish and longevity? To ensure glazing safety and maintain coating durability, use mild, non-abrasive cleaning agents applied with a soft cloth or sponge.

    Avoid scrubbing with rough pads, which can damage the delicate surface. Rinse thoroughly with warm water to remove residues that might degrade the finish over time.

    Clean regularly to prevent buildup of soap scum and minerals, which can erode the glaze if left unattended. Dry the tub after each use to minimize water spots and maintain its pristine appearance.

    Avoiding Harsh Chemicals

    Why should you steer clear of harsh chemicals on your reglazed bathtub? Reglazed surfaces are coated with materials sensitive to harmful solvents found in many strong cleaners. Using abrasive or solvent-based products can degrade the finish, causing premature wear and dullness.

    Additionally, these chemicals may react with epoxy fumes still present after reglazing, leading to discoloration or surface damage. To keep your bathtub looking new, opt for mild, non-abrasive cleaners specifically designed for delicate surfaces.

    Avoid bleach, ammonia, or products containing acetone, as they can compromise the reglaze integrity. By minimizing exposure to harsh chemicals, you preserve both the appearance and longevity of your bathtub’s finish, ensuring it stays safe and visually appealing for years to come.

    Frequently Asked Questions

    Can Reglazing Affect Water Temperature Tolerance of the Bathtub?

    Reglazing doesn’t typically affect your bathtub’s water temperature tolerance if the coating compatibility is guaranteed. Proper application maintains reglazing durability, so you can safely enjoy varied water temperatures without compromising the tub’s integrity or finish.

    Does Reglazing Change the Bathtub’s Slip Resistance?

    Imagine walking on a freshly waxed floor, glossy but slippery. Reglazing shifts your tub’s slip resistance depending on gloss vs. matte finish.

    Matte offers better grip due to durability versus porosity differences in coatings.

    Will Reglazing Affect the Bathtub’s Ability to Hold Stain-Resistant Properties?

    Yes, reglazing restores your bathtub’s stain resistance by creating a smooth, sealed surface, which helps maintain its cleanliness and enhances bathtub longevity.

    Just ensure the process is done properly for optimal, long-lasting results.

    Are There Eco-Friendly Reglazing Options Available?

    Yes, you can choose eco-friendly reglazing options that use non-toxic, low-VOC coatings. These alternatives minimize environmental impact and health risks, ensuring your bathtub looks great while keeping your home safer and more sustainable.

    Can Pets Safely Use a Reglazed Bathtub?

    You can safely bathe pets in a reglazed bathtub once fully cured, but be aware of reglazing drawbacks like chemical residues and surface durability.

    Ensure proper ventilation and curing time to protect your pets’ safety effectively.

    Conclusion

    You can safely bathe in your reglazed bathtub once the finish has fully cured, typically within 24 to 72 hours. Studies show that over 90% of reglazed tubs maintain their finish for at least five years when properly cared for.

    To protect your investment and health, avoid water exposure until the surface feels dry and smooth. Use only mild, non-abrasive cleaners to prevent damage.

    Following these guidelines ensures a durable, safe, and attractive tub for years to come. In conclusion, it is safe to bathe in a reglazed bathtub when these precautions are observed.

  • Is a Single Knob or Multiple Knob Bathtub Better

    Is a Single Knob or Multiple Knob Bathtub Better

    You want ease and speed, or control and precision.

    Choosing between a single knob and multiple knob bathtub faucet hinges on how you prioritize operation, temperature adjustment, and design.

    Deciding which is better—a single knob or multiple knob bathtub—depends on your personal preferences and needs.

    Each option offers distinct advantages that impact your daily routine and bathroom style.

    Understanding these differences will help you decide which setup fits your needs best.

    So let’s examine the key factors that set them apart.

    Key Takeaways

    • Single knob faucets offer streamlined, one-handed control ideal for quick temperature and flow adjustments with a modern minimalist look.
    • Multiple knob faucets provide granular, independent control over hot and cold water, suiting precise temperature preferences and traditional aesthetics.
    • Single knob designs typically require less maintenance and simpler installation, making them more durable and cost-efficient over time.
    • Multiple knob setups may need more space, involve higher installation complexity, and require more upkeep due to additional components.
    • Choose based on lifestyle, bathroom layout, and aesthetic preference: single knob for convenience and minimalism, multiple knobs for classic style and precise control.

    Design Differences: Single vs Multiple Knob Bathtub Faucets

    single lever vs traditional knobs design

    How do single and multiple knob bathtub faucets differ in design? Single knob faucets integrate temperature and flow control into one lever, offering a streamlined silhouette that aligns with modern design trends.

    Multiple knob faucets separate hot and cold water controls, often featuring two or three distinct handles, presenting a more traditional or classic aesthetic. When choosing between these, you’ll notice material finishes play a significant role; single knob models frequently use brushed nickel or matte black for a minimalist look, while multiple knob faucets often showcase polished chrome or brass for a vintage appeal.

    Both designs accommodate various installation styles, but their configuration impacts the overall bath space’s visual balance. Understanding these design nuances helps you select a faucet that complements your bathroom’s decor and functional needs precisely.

    Ease of Daily Use: Single or Multiple Knobs?

    When managing water temperature and flow, does a single knob faucet simplify your daily routine compared to multiple knobs? The ease of daily use largely depends on how intuitively you can adjust water flow control. Single knob faucets allow you to regulate flow and temperature with one motion, reducing effort and time.

    Single knob faucets simplify daily routines by allowing quick, intuitive control of water flow and temperature.

    Multiple knobs require coordinating distinct controls, which can slow you down.

    Consider these factors for ease of daily use:

    • Quick adjustments with a single hand
    • Precise water flow control in one movement
    • Simultaneous regulation of hot and cold water
    • Potential for over- or under-adjusting with multiple knobs
    • Learning curve differences for first-time users

    Ultimately, single knob faucets streamline your interaction, enhancing efficiency during daily use.

    Temperature Control in Single vs Multiple Knob Faucets

    single control vs dual control temperature regulation

    Beyond ease of use, temperature control plays a significant role in choosing between single and multiple knob faucets. With a single knob faucet, you adjust one control to regulate both hot and cold water, offering streamlined temperature regulation through a unified user interface.

    This design lets you fine-tune water temperature efficiently but may require slight trial and error to find the perfect setting. In contrast, multiple knob faucets separate hot and cold water controls, enabling direct adjustment of each.

    This division can provide more granular temperature regulation, but the user interface demands simultaneous manipulation of both knobs to achieve the desired mix. Ultimately, your preference depends on whether you prioritize simplicity and speed or precise, independent temperature adjustments in your bathtub faucet.

    Water Flow Control: How Knob Types Affect Precision

    Why does water flow control matter so much in bathtub faucets? Because it directly impacts your bathing experience by regulating water volume and pressure with precision flow. The type of knob you use affects this control, especially through knob ergonomics, which influence how easily you can adjust flow rates.

    With a single knob, you get streamlined control, but it can be less precise when fine-tuning water flow. Multiple knobs allow independent adjustments, offering more exact flow regulation but may require more effort.

    Consider these factors:

    • Single knob offers quick flow changes with moderate precision
    • Multiple knobs provide granular flow control
    • Ergonomic design reduces slip and improves adjustment accuracy
    • Knob size affects how finely you can control flow
    • Smooth mechanical action enhances precision flow feedback

    Choosing the right knob type ensures optimal water flow control tailored to your needs.
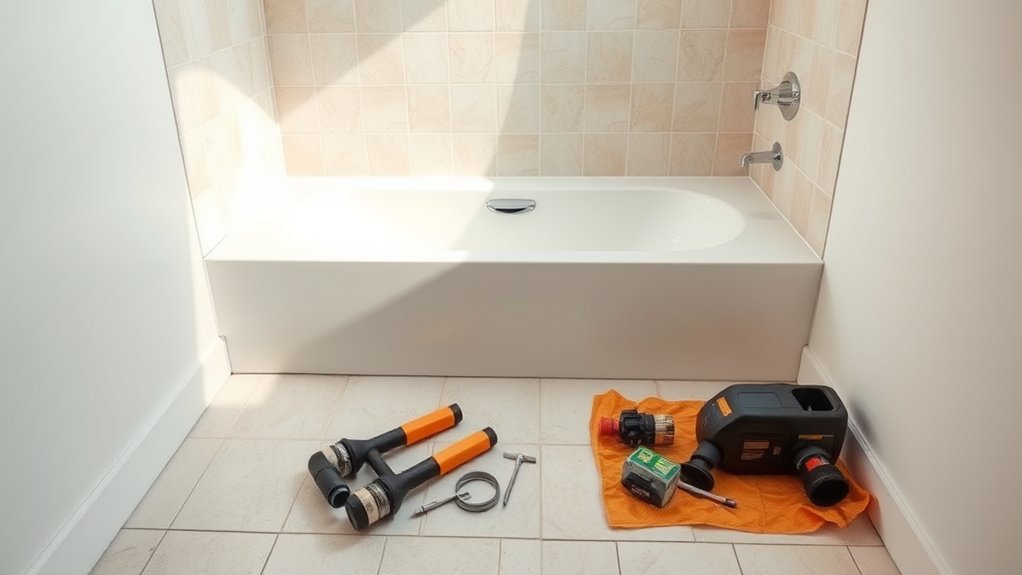
    Style and Aesthetic Appeal of Bathtub Faucet Setups

    minimalist single knob vs classic multi knob contrast

    How does the style of your bathtub faucet setup influence the overall bathroom design? A single knob faucet offers a minimalist, streamlined look that complements modern aesthetics. In contrast, multiple knob setups provide a classic, segmented appearance, often appealing to traditional or vintage styles.

    Your choice should be style focused, balancing aesthetic considerations with your bathroom’s theme. This comparison driven decision isn’t solely about function; neither option is inherently superior in usability but differs in visual impact.

    Keep in mind durability tradeoffs: multiple knobs involve more components, potentially increasing wear points, whereas single knobs tend to be more robust. Ultimately, you prioritize the design element that aligns with your bathroom’s character, ensuring your faucet setup enhances rather than detracts from the room’s cohesive style.

    Installation Complexity and Cost Considerations

    When considering installation complexity and cost, which bathtub faucet setup fits your needs better? Single knob faucets generally offer lower installation complexity and reduced installation cost due to fewer components and simpler plumbing requirements.

    Multiple knob faucets, however, demand more precise alignment and additional plumbing lines, increasing both complexity and cost.

    Key factors to consider include:

    • Number of water lines needed, impacting installation complexity
    • Time required for precise knob alignment
    • Potential need for specialized tools or expertise
    • Cost differences in parts and labor
    • Compatibility with existing plumbing setups

    Maintenance Needs for Single vs Multiple Knob Faucets

    Beyond installation, maintaining your bathtub faucet can substantially affect its long-term performance and convenience. Single knob faucets typically require less upkeep since they have fewer moving parts, reducing the likelihood of leaks or mechanical failures. This simplicity also streamlines your maintenance routine, saving time and effort.

    In contrast, multiple knob faucets involve separate valves for hot and cold water, increasing the complexity of repairs and part replacements.

    When considering maintenance aesthetics, single knobs offer a cleaner look with fewer visible components to clean and polish. Multiple knobs, however, may show wear unevenly, demanding more frequent attention to maintain a uniform appearance.

    Your choice should balance these two word ideas, ease of maintenance and consistent aesthetics, to optimize both function and visual appeal over time.

    Safety Features in Single and Multiple Knob Controls

    Why does the safety of your bathtub faucet controls matter? You rely on these controls to regulate water temperature and flow precisely, preventing scalding or sudden pressure changes. Single operation knobs simplify safety by combining temperature and flow adjustments into one control, reducing user error.

    Multiple knob faucets offer separate controls for hot, cold, and diverter functions, requiring careful coordination but allowing more granular adjustments.

    Key safety features to consider include:

    • Anti-scald mechanisms preventing water above safe temperatures
    • Clear labeling for hot and cold controls
    • Pressure balance valves maintaining consistent water pressure
    • Childproof designs on single operation knobs
    • Durable materials resistant to corrosion and wear

    Understanding these elements ensures you select faucet controls that safeguard your bathing experience effectively.

    Choosing Bathtub Faucets for Small vs Large Bathrooms

    How do you select the right bathtub faucet for your bathroom size? In small bathrooms, prioritize space efficiency by choosing faucets with compact, single-knob designs that minimize clutter while maintaining precise temperature control. Their streamlined profiles enhance design aesthetics without overwhelming limited space.

    For larger bathrooms, you can opt for multiple knob faucets that offer greater control over water flow and temperature settings, complementing expansive layouts with a sophisticated, customized look. In both cases, consider the faucet’s scale relative to your tub and surrounding fixtures to maintain balanced design aesthetics.

    Additionally, ensure the installation supports your bathroom’s water pressure requirements. By aligning faucet choice with bathroom size, you optimize both functionality and visual harmony, achieving efficient use of space without sacrificing style or performance.

    Matching Faucet Setups to Your Lifestyle and Preferences

    You’ll want to choose a faucet setup that balances convenience and control with your daily routine. Single knob faucets offer quick adjustments, while multiple knobs provide precise temperature and flow regulation.

    Consider how design and functionality align with your preferences to optimize your bathtub experience.

    Convenience and Control

    Where does convenience meet control in your bathtub faucet choice? You want a setup that aligns with your daily routine, balancing contemporary durability with budget aesthetics. Single knob faucets offer quick, one-handed operation. They are ideal for swift temperature adjustments.

    Multiple knob setups provide granular control, perfect if you prefer fine-tuning hot and cold water separately. Consider these points to match convenience and control to your lifestyle:

    • Single knob faucets streamline use, reducing effort and time.
    • Multiple knobs allow precise temperature calibration, enhancing comfort.
    • Contemporary durability materials ensure long-lasting performance.
    • Budget aesthetics influence whether you prioritize style or cost-efficiency.
    • Maintenance complexity varies; single knobs typically require less upkeep.

    Design and Functionality

    Which faucet design best suits your lifestyle and preferences depends on the balance between aesthetic appeal and functional requirements. Single knob faucets align with contemporary design trends, offering sleek, minimalistic control that simplifies temperature adjustments. They often incorporate advanced water saving features, enabling efficient flow management without compromising comfort.

    Multiple knob setups, by contrast, provide granular control over hot and cold water, ideal if you prioritize precise temperature regulation. However, they may require more maintenance and space, which affects overall functionality.

    When selecting, consider your daily usage patterns and bathroom layout; a single knob suits streamlined routines, while multiple knobs cater to varied preferences and complex plumbing needs. Both designs now integrate water saving features, so evaluate which matches your lifestyle and complements your bathroom’s design trends for optimal functionality.
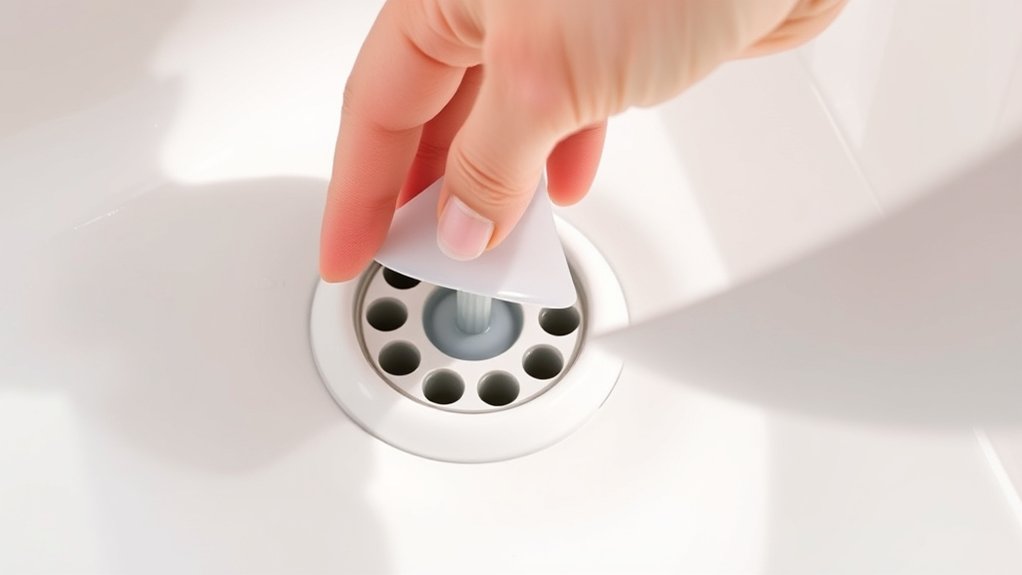
    Frequently Asked Questions

    Can Single or Multiple Knob Faucets Affect Water Pressure?

    You’ll notice single handle vs multi handle faucets can slightly influence water pressure effects due to valve design and flow control. Single handles often offer smoother pressure adjustments, while multi handles provide more precise temperature but may impact pressure consistency.

    Are There Eco-Friendly Options for Single or Multiple Knob Faucets?

    You’ll find eco-friendly options in both single and multiple knob faucets designed for water conservation. These models use advanced flow restrictors and aerators, helping you reduce water waste without sacrificing performance or comfort in your bathtub experience.

    How Do Single and Multiple Knob Faucets Compare in Durability?

    You’ll find durability comparison favors single knob faucets due to fewer moving parts, reducing wear. However, multiple knobs offer easier maintenance considerations by isolating controls, potentially extending component lifespan with targeted repairs and replacements.

    Do Single or Multiple Knob Faucets Require Different Pipe Fittings?

    Like puzzle pieces fitting together, single and multiple knob faucets demand distinct compatibility considerations. You’ll face varied installation requirements, as each needs specific pipe fittings to ensure proper alignment, water flow, and secure attachment during setup.

    Can Single Knob Faucets Be Converted to Multiple Knobs Easily?

    You can’t easily convert a single knob faucet to multiple knobs without changing the internal plumbing and valve assembly. Multiple knobs require separate hot and cold water controls, so you’ll need new fittings and possibly wall modifications.

    Conclusion

    Choosing between single and multiple knob bathtub faucets hinges on your priorities. If you worry about losing precise temperature control with a single knob, rest assured modern single-handle valves offer accurate adjustments. They simplify daily use and suit minimalist designs, while multiple knobs give granular control and traditional appeal.

    Consider your space, maintenance tolerance, and style preferences to select the faucet setup that best fits your routine and bathroom aesthetics. Ultimately, deciding whether a single knob or multiple knob bathtub faucet is better depends on balancing convenience, control, and design to match your needs.
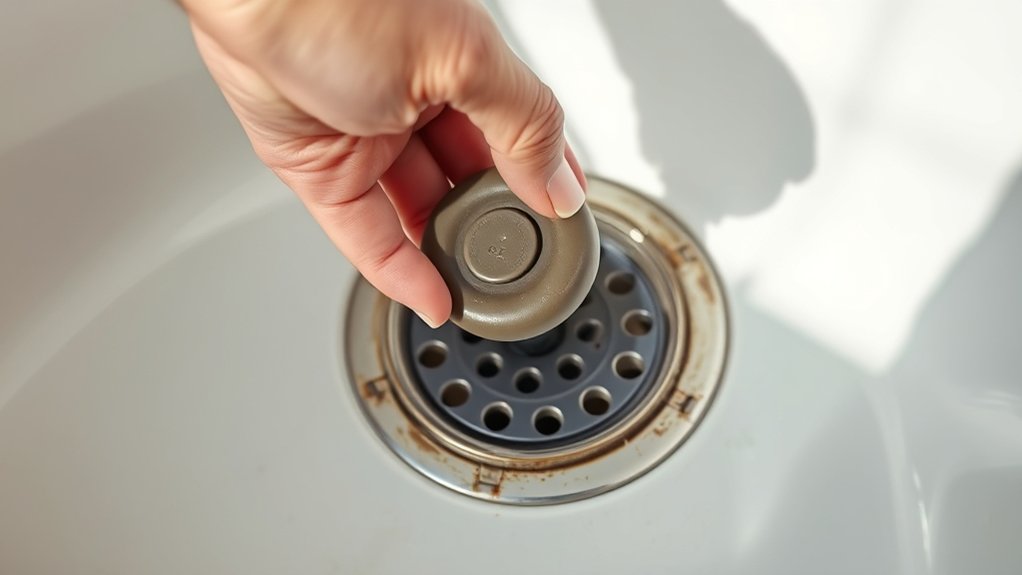
  • How to Remove a Porcelain Bathtub

    How to Remove a Porcelain Bathtub

    Removing a porcelain bathtub is like performing surgery on your bathroom—it demands precision, the right tools, and careful planning.

    When removing a porcelain bathtub, you’ll need to shut off water, disconnect fixtures, and protect your space from dust and debris before you even begin.

    Skipping these steps can lead to costly mistakes, but if you follow a clear, methodical process, you’ll avoid common pitfalls and make the job manageable.

    Let’s start by gathering what you’ll need.

    Key Takeaways

    • Turn off the water supply, disconnect plumbing fixtures, and remove caulking around the tub edges carefully.
    • Wear heavy-duty gloves, safety goggles, and a dust mask for protection against sharp porcelain shards and dust.
    • Use a reciprocating saw to cut metal supports if needed, then pry the tub loose with a pry bar and hammer.
    • Support adjacent walls to prevent damage and gently lift the tub out with at least two people to avoid injury.
    • Dispose of the tub following local guidelines and prepare the space by cleaning and inspecting subfloor and framing.

    Tools and Materials for Removing a Porcelain Bathtub

    safety first tub removal toolkit notes

    What tools and materials will you need to remove a porcelain bathtub safely and efficiently? First, prioritize safety protocols: wear heavy-duty gloves, safety goggles, and a dust mask to protect against sharp porcelain shards and dust.

    Prioritize safety by wearing gloves, goggles, and a dust mask to protect against sharp porcelain shards and dust.

    For tool recommendations, gather a reciprocating saw with a demolition blade to cut through metal supports and the tub itself if necessary. A pry bar and hammer will help loosen and remove the tub from its frame and walls.

    Also, use utility knives to cut caulking and sealants around the tub edges. Have heavy-duty plastic sheeting and drop cloths to protect the surrounding area and collect debris. Finally, a bucket and rags are essential for managing residual water.

    Following these ideas ensures a controlled, efficient removal process without injury or damage.

    How to Prepare Your Bathroom for Porcelain Bathtub Removal

    Before you begin removing your porcelain bathtub, you need to prepare the bathroom to guarantee safety and protect surrounding surfaces. Start by turning off the water supply and disconnecting plumbing fixtures to avoid leaks.

    Remove any nearby furniture and cover immovable items with plastic sheeting. Use painter’s tape and heavy-duty plastic to seal doorways and vents, creating an effective dust containment barrier to prevent debris from spreading.

    Wear appropriate personal protective equipment, including gloves, goggles, and a dust mask, to uphold pre removal safety standards. Clear the floor of rugs or mats and place drop cloths to protect tiles or flooring.

    Ensure proper ventilation while maintaining dust containment. These steps minimize hazards and create a controlled workspace, making the removal process safer and more efficient.

    Troubleshooting Common Problems When Removing a Porcelain Tub

    stubborn adhesives careful removal risks

    You’ll often encounter stubborn adhesives that resist scraping, requiring the right solvents and tools to loosen them effectively.

    Take care to support adjacent walls to prevent cracking or damage during tub removal.

    Addressing these issues early will save time and avoid costly repairs.

    Handling Stubborn Adhesives

    How do you effectively tackle stubborn adhesives when removing a porcelain bathtub? Start by applying a commercial adhesive remover formulated for construction materials. Let it sit for the recommended time to soften the bond.

    Use a plastic scraper to gently pry the adhesive without damaging the tub’s surface. For persistent spots, repeat the application or use a heat gun at low settings to loosen the adhesive, then scrape again.

    Avoid metal tools that can chip porcelain. Once the adhesive is removed, clean the surface thoroughly to prevent residue from complicating porcelain tub disposal.

    Proper handling of stubborn adhesives not only eases removal but also ensures safer, cleaner disposal and prepares the area for any subsequent renovation steps.

    Preventing Wall Damage

    Effectively removing stubborn adhesives reduces the risk of damaging surrounding materials, but protecting your walls requires additional care. To avoid porcelain danger during removal, use plastic or wooden shims between the tub and wall to prevent direct contact.

    Avoid metal tools that can scratch or chip wall surfaces. When loosening the tub, apply gentle, controlled force to minimize vibrations that may crack drywall or loosen tile. Seal exposed wall edges with painter’s tape to shield against accidental damage and moisture infiltration.

    If you encounter stubborn caulk, soften it with a heat gun or commercial remover rather than prying aggressively. Prioritizing wall preservation ensures you maintain structural integrity and reduce costly repairs after the tub’s removal.

    Step-by-Step Guide to Detaching and Removing Your Porcelain Bathtub

    Where do you begin when detaching a porcelain bathtub? First, turn off the water supply and disconnect the faucet and drain fixtures carefully. Remove any caulking around the tub edges to prevent wall damage, preserving your bathroom design.

    Next, detach the access panel to reach the tub’s mounting brackets. Unscrew or pry off these brackets, noting their placement for reinstallation or remodeling. Support the tub as you loosen it from the wall framing to avoid injury or structural damage.

    Safety considerations are critical. Wear gloves, eye protection, and ensure the area is well-ventilated. Finally, gently lift the tub out of its alcove, using help if necessary to manage its weight and prevent damage to your bathroom or yourself during removal.

    How to Handle and Dispose of a Porcelain Bathtub Safely

    safe careful porcelain tub disposal

    Once you’ve successfully removed the porcelain bathtub from its alcove, focus on handling it with care to prevent injury and avoid damaging your property. Porcelain tubs are heavy and brittle, so plan your moves carefully. Avoid unrelated topics or distractions while maneuvering it.

    Consider these ideas for safe handling and disposal:

    • Use proper lifting techniques, involving at least two people, to distribute weight evenly.
    • Wear protective gloves and safety goggles to guard against sharp edges.
    • Inspect the tub for cracks or damage that could cause sudden breaks.
    • Contact local waste management or recycling centers for porcelain disposal guidelines.

    Following these steps ensures safety and environmental responsibility while avoiding unnecessary complications when handling and disposing of your porcelain bathtub.

    Next Steps After Removing Your Porcelain Bathtub

    After removing your porcelain bathtub, plan how to dispose of or recycle the materials responsibly to comply with local regulations. Clear the area thoroughly and inspect the plumbing and subfloor for any damage or needed repairs.

    Once the space is prepared, you can proceed with the measurements and setup required for your new bathtub installation.

    Disposal And Recycling Options

    How should you handle the porcelain bathtub once it’s removed? Proper disposal and recycling depend on removal timing and local permit requirements. Plan disposal promptly to avoid storage issues and ensure compliance with regulations.

    Consider these options:

    • Contact your local waste management for bulk pickup services that accept porcelain tubs.
    • Explore recycling centers that process porcelain and metal components separately.
    • Rent a dumpster if removal timing coincides with other renovation debris for efficient disposal.
    • Donate or sell intact tubs to salvage yards or reuse organizations if in good condition.

    Always verify permit requirements before disposal to avoid fines. Efficient handling minimizes environmental impact and aligns with municipal codes, ensuring your project proceeds smoothly after removal.

    Preparing For New Installation

    What’s the best way to prepare your space for the new bathtub installation? First, ensure the area is clean and free of debris from the removal process. Check the plumbing for leaks or damage and repair as needed.

    Measure the space accurately to confirm the new bathtub fits correctly, avoiding any unused topic or unrelated discussion during this step. Inspect the subfloor for water damage or rot and reinforce or replace it if necessary.

    Confirm the wall studs and framing are secure and level to support the new tub. Finally, install any necessary plumbing fixtures or drainage components before setting the bathtub.

    This methodical approach guarantees a smooth installation without overlooking critical details related to your project’s next phase.

    Frequently Asked Questions

    Can I Remove a Porcelain Bathtub by Myself Without Professional Help?

    You can remove a porcelain bathtub yourself, but ensure porcelain safety by wearing protective gear and handling carefully. Be prepared for disposal challenges since porcelain is heavy and bulky, requiring proper local waste management or recycling options.

    How Long Does the Entire Bathtub Removal Process Usually Take?

    When it comes to remodeling timelines, expect the entire bathtub removal process to take about 4 to 8 hours, provided you follow safety protocols closely.

    Rushing might backfire, so plan carefully to avoid setbacks.

    What Are Signs That My Bathtub Needs to Be Replaced Rather Than Repaired?

    You’ll know your bathtub needs replacement not repair if the porcelain alternative has cracks, chips, or stains that penetrate the surface.

    Also, if the bathtub lifespan exceeds 30 years, causing structural weakening and persistent leaks, replacement is necessary.

    Are There Eco-Friendly Options for Disposing of Old Porcelain Bathtubs?

    You’ll want to know that over 60% of porcelain bathtubs can be recycled. For eco friendly disposal, explore local recycling options or donation programs that repurpose materials, reducing landfill waste and conserving resources efficiently.

    What Are the Cost Estimates for Hiring Professionals to Remove a Porcelain Bathtub?

    You can expect bathroom demolition and tub removal costs to range from $500 to $1,500, depending on labor rates, disposal fees, and tub size.

    Get detailed quotes to ensure accurate budgeting for your project.

    Conclusion

    You’ll shut off the water, disconnect fixtures, and seal the area. You’ll cut through caulk, pry loose mounting brackets, and carefully detach the tub.

    You’ll lift with a partner, inspect for damage, and dispose of debris responsibly. Each step demands precision, teamwork, and safety.

    By following this methodical process, you’ll remove your porcelain bathtub efficiently and prepare your space perfectly for the next installation of your porcelain bathtub.

  • How to Remove a Jetted Bathtub

    How to Remove a Jetted Bathtub

    If you’re planning to remove a jetted bathtub, you’ll need to approach the task methodically to avoid damage and ensure safety. Removing a jetted bathtub requires careful planning and the right tools to handle both plumbing and electrical components safely. Start by gathering the appropriate tools and protective gear.

    Next, carefully disconnect both the plumbing and electrical connections. Understanding how to properly access and remove the tub surround is essential before lifting out the unit itself. With several critical steps involved, knowing how to handle each one will save you time and prevent costly mistakes.

    Key Takeaways

    • Turn off power and water supply, testing to ensure no electricity or water flows before starting disconnections.
    • Gather necessary tools: utility knife, wrench, pry bar, and protective gear like gloves and safety glasses.
    • Remove tub surround by scoring caulk and carefully prying panels to access plumbing and mounting brackets.
    • Disconnect plumbing and electrical connections, capping pipes and labeling wires to avoid damage and confusion.
    • Enlist help to lift the tub evenly, avoid damage, and dispose of the tub following local recycling or disposal regulations.

    Tools and Materials Needed to Remove a Jetted Bathtub

    tools and materials for removing jetted bathtub

    What tools and materials do you need to remove a jetted bathtub efficiently? Start by gathering a utility knife, adjustable wrench, screwdriver set, pry bar, and a reciprocating saw, essential for cutting through stubborn fixtures. You’ll also need a bucket and towels to manage residual water.

    Prioritize protective gear like gloves and safety glasses. Incorporate a measuring tape and notepad to document dimensions, aiding remodeling aesthetics and ensuring new installations fit seamlessly.

    Effective budget planning requires you to assess tool availability. Rent specialized equipment if buying exceeds your financial scope. Organize all materials within reach before beginning to streamline the removal process.

    How to Safely Disconnect Plumbing and Electrical Connections

    Before you start, turn off the power supply to prevent electrical hazards and shut off the water valves to stop any flow. Next, carefully detach the plumbing lines using appropriate tools to avoid damage or leaks.

    Following these steps ensures a safe disconnection process for both plumbing and electrical components.

    Turn Off Power Supply

    How do you guarantee safety when disconnecting your jetted bathtub’s electrical and plumbing systems? Begin with a clear power shutdown. Locate your circuit breaker panel and identify the breaker labeled for the bathtub or bathroom. Flip the breaker to the off position to cut electrical power completely.

    Use a voltage tester at the bathtub’s electrical junction box to confirm no current flows. This two word discussion idea, power shutdown, is critical before any disconnection. Avoid relying on switches or plugs alone to prevent shock hazards.

    After confirming power is off, you can safely proceed with disconnecting electrical wires. Remember, always follow local electrical codes and use insulated tools. This precise procedure minimizes risk, ensuring your work area is safe as you move forward with removing plumbing and electrical connections.

    Shut Off Water Valves

    After ensuring the power supply is completely off, focus on stopping water flow to prevent leaks or water damage during disconnection. Locate the shut off water valves that control your bathtub’s supply lines. These are usually under the tub access panel or near the main water line.

    Turn each valve clockwise until fully closed; this halts water flow effectively. Verify closure by opening the faucet and confirming no water emerges.

    Maintaining electrical safety is crucial; confirm the power remains off before proceeding to avoid shocks. Never rely solely on the circuit breaker; use a voltage tester to ensure no current.

    With water flow securely stopped and power off, you’re prepared to safely disconnect plumbing and electrical connections without risking damage or injury.

    Safely Detach Plumbing Lines

    Where do you start when detaching the plumbing lines of your jetted bathtub? Begin by ensuring the main water supply is fully shut off. Next, drain the remaining water from the pipes to avoid leaks. Follow these steps carefully to safely disconnect both plumbing and electrical lines:

    1. Use a wrench to loosen the fittings connecting the water supply lines. Avoid forcing connections.
    2. Cap the open pipes temporarily to prevent debris entry.
    3. Disconnect the electrical wiring by removing the junction box cover, then carefully unplug the connectors. Remember idea one: always verify the power is off.
    4. Detach the pump lines, noting idea two: label connections for easier reinstallation.

    These precise actions minimize damage and ensure safety throughout the removal process.

    Removing the Tub Surround to Access the Jetted Bathtub

    Why is removing the tub surround essential for accessing your jetted bathtub? The surround acts as a barrier, concealing plumbing and structural elements.

    To remove it, start by scoring the caulk seams with a utility knife to avoid damaging walls. Carefully pry off the surround panels using a flat pry bar, working slowly to prevent cracking tiles or drywall.

    As you detach the surround, emptying debris promptly prevents clutter and ensures a safe workspace. Once removed, inspect the wall studs and plumbing for damage or mold.

    This step is vital to prepare for possible wall retiling after the tub’s removal. Removing the surround gives you the clearance needed to work on the jetted tub without obstruction, streamlining the subsequent removal and replacement process.

    How to Loosen and Lift Out Your Jetted Bathtub

    detach loosen lift protect

    How do you safely loosen and lift out a jetted bathtub without causing damage? Start by ensuring all connections are detached, including water and electrical lines. Removing tile around the tub may be necessary to access mounting brackets.

    Begin by detaching all water and electrical connections, and remove surrounding tile to access mounting brackets.

    Clean off any soap residues that can cause slipping or sticking during removal. Next, carefully loosen the tub’s fastening points.

    1. Use a pry bar gently to avoid cracking surrounding tile or drywall.
    2. Check that all plumbing connections are fully disconnected before lifting.
    3. Enlist help to evenly lift the tub, preventing strain or damage.
    4. Lift the tub straight up to avoid scraping walls or floors.

    Follow these steps precisely to maintain control and prevent costly repairs.

    Properly Handling and Disposing of Your Old Jetted Bathtub

    When handling your old jetted bathtub, wear protective gloves and ensure stable footing to prevent injury during removal.

    Consider recycling or donating components that remain in good condition to reduce waste.

    Finally, follow local regulations for disposing of non-recyclable parts to avoid environmental hazards.

    Safety Precautions During Removal

    Where should you start to guarantee safety while removing your old jetted bathtub? Begin with a thorough risk assessment to identify potential hazards like sharp edges, electrical components, and heavy lifting. Always wear appropriate safety gear, including gloves, goggles, and sturdy footwear, to protect yourself from injury.

    Follow these key steps to ensure safe removal:

    1. Cut power at the breaker to eliminate electrical shock risk.
    2. Drain all water completely from the jets and plumbing.
    3. Disconnect plumbing carefully to avoid water damage or spills.
    4. Use proper lifting techniques or get assistance to handle the tub’s weight.

    Recycling and Donation Options

    Why should you consider recycling or donating your old jetted bathtub instead of simply discarding it? Exploring recycling options helps divert materials like acrylic, fiberglass, and metal from landfills, promoting environmental sustainability. Start by identifying local facilities equipped to process these components.

    For donation considerations, ensure the bathtub is functional and clean; many organizations accept gently used fixtures for resale or reuse. Contact charities or Habitat for Humanity ReStores to confirm their acceptance policies. Additionally, documenting the bathtub’s condition with photos expedites donation approval.

    Prioritize recycling or donation to reduce waste and support community resources effectively. By following these steps, you handle your old jetted bathtub responsibly while maximizing its potential for reuse or material recovery.

    Proper Waste Disposal Methods

    How do you ensure your old jetted bathtub is disposed of safely and according to local regulations? Proper waste disposal protects the environment and complies with legal standards. Avoid discussing any irrelevant topic or unrelated idea that might distract from this critical step.

    Follow these precise steps:

    1. Contact your local waste management authority to confirm disposal guidelines specific to jetted tubs.
    2. Drain and remove all plumbing components, ensuring no residual water or chemicals remain.
    3. Separate recyclable parts like metal and plastic to reduce landfill waste.
    4. Arrange for pickup or transport to a certified hazardous waste or bulky item facility.

    Common Plumbing and Electrical Issues When Removing a Jetted Bathtub

    When tackling the removal of a jetted bathtub, you’ll encounter specific plumbing and electrical challenges that require careful attention. First, ensure you shut off water and power at the main sources to avoid hazards.

    Disconnecting the plumbing lines involves draining residual water and capping pipes to prevent leaks. Electrical wiring linked to the pump demands proper disconnection; note if it’s hardwired or plugged into a GFCI outlet.

    Weight considerations are crucial. Jetted tubs are heavy, so plan your cleanup accordingly to avoid injury or damage during removal. Additionally, anticipate residual water in the jets and pipes, requiring thorough drainage to prevent messes.

    Preparing for these plumbing and electrical nuances ensures a safer, more efficient removal process.

    Preparing Your Bathroom After Removing a Jetted Bathtub

    attention to bathroom after tub removal

    After safely disconnecting plumbing and electrical components and removing the jetted bathtub, your focus shifts to preparing the bathroom for its next phase. Proper preparation is essential to avoid water damage and mold growth. Start by thoroughly cleaning the exposed area, removing debris and old sealants.

    Next, address waterproofing considerations by inspecting and repairing the subfloor and walls to guarantee a moisture barrier is intact. Mold prevention is vital; apply a mold-resistant primer to all surfaces. Finally, plan for proper ventilation to reduce humidity levels moving forward.

    Follow these steps:

    1. Clean exposed surfaces meticulously.
    2. Inspect and repair waterproofing layers.
    3. Apply mold-resistant treatments to prevent fungal growth.
    4. Guarantee adequate ventilation to maintain dryness.

    Taking these steps will safeguard your bathroom’s integrity and prepare it for a seamless renovation.

    Frequently Asked Questions

    Can I Convert My Jetted Bathtub Into a Regular Bathtub?

    Yes, you can convert your jetted bathtub into a convertible tub by disabling the jets and rerouting the plumbing.

    You’ll need to cap jet lines and adjust water flow to function like a standard tub properly.

    How Long Does It Typically Take to Remove a Jetted Bathtub?

    The removal timeline typically spans 4 to 8 hours, depending on your experience and tools. You’ll want to prioritize safety considerations, like shutting off power and water, to prevent electrical hazards and leaks during the process.

    Are There Any Health Risks Associated With Jetted Bathtubs?

    You might worry about health risks from jetted bathtubs, but proper maintenance keeps them safe. Regularly cleaning jets and pipes prevents bacterial buildup.

    Follow maintenance tips precisely to avoid infections and ensure your bathtub stays hygienic.

    Can I Install a New Jetted Bathtub in the Same Space?

    You can install a new jetted bathtub in the same space, but verify installation feasibility by checking dimensions and plumbing. Also, guarantee electrical considerations meet code requirements for grounding and GFCI protection before proceeding.

    What Are the Benefits of Replacing a Jetted Bathtub?

    Replacing a jetted bathtub offers benefits like improved technology and efficiency. However, you must weigh tradeoffs such as costs and installation considerations, including plumbing adjustments and electrical requirements, to guarantee a smooth, compliant upgrade process.

    Conclusion

    Removing your jetted bathtub is like untangling a complex knot—each step requires precision and care. By methodically disconnecting plumbing and electrical connections, removing the surround, and lifting the tub with proper support, you ensure a smooth transition to your bathroom’s next chapter.

    Treat this process as laying a new foundation, where thorough preparation and careful cleanup symbolize the fresh start your space deserves. Follow these instructions closely for a safe, efficient removal.

    By paying attention to each detail, you can confidently complete the removal of your jetted bathtub, setting the stage for your bathroom’s transformation.

  • How to Plug a Bathtub Drain With Holes

    How to Plug a Bathtub Drain With Holes

    You expect a bathtub drain with holes to hold water securely, yet even small holes can cause persistent leaks and damage. Identifying the exact size and location of these holes is essential before you attempt any repairs.

    With the right approach and materials, you can effectively seal the drain and restore its function. However, not every method suits every drain type or damage level, so understanding your options is critical.

    Key Takeaways

    • Inspect the drain’s metal surface under good lighting to spot rust, corrosion, or holes using a flashlight and touch for irregularities.
    • Evaluate hole size and location to determine severity and whether temporary or permanent plugging methods are needed.
    • Clean the area thoroughly before applying plumber’s putty for small holes or waterproof epoxy/repair kits for larger holes.
    • Use silicone-based or polyurethane sealants designed for wet environments, ensuring compatibility with your tub material.
    • Replace or maintain the drain stopper to ensure a tight seal and prevent future leaks after completing repairs.

    Spotting and Evaluating Holes in Your Bathtub Drain

    spotting assessing drain corrosion holes

    How can you quickly identify holes in your bathtub drain? Start by closely inspecting the drain’s metal surface under good lighting. Look for signs of spotting corrosion, which often appears as rust-colored or pitted areas, indicating weakened material that may have developed holes.

    Use a flashlight to reveal hidden spots and run your fingers around the drain opening to detect irregularities. Next, focus on evaluating gaps in drains by checking for visible cracks or tiny perforations where water may leak through.

    Tap gently with a non-metallic tool to listen for hollow sounds, which can suggest compromised sections. Document any damage locations and sizes precisely to determine the severity. This thorough assessment ensures you address all vulnerable points before moving forward with repairs or plugging solutions.

    DIY Ways to Plug Bathtub Drain Holes

    When tackling bathtub drain holes, you’ll want to choose the most effective DIY method based on the hole’s size and location. For small holes, applying plumber’s putty or a rubber gasket can effectively plug drains and stop leaks.

    Larger holes may require a patch using waterproof epoxy or a drain repair kit designed for metal or acrylic tubs. Start by thoroughly cleaning the area to ensure adhesion. Next, apply the chosen material precisely, following product instructions to avoid weak seals.

    For accessible holes, inserting a rubber stopper or expandable drain plug offers a temporary fix while you prepare for more permanent solutions. By selecting the correct technique, you’ll ensure efficient plugging drains and fixing leaks without unnecessary replacement or professional intervention.

    Choosing Sealants to Fix Bathtub Drain Holes

    sealants for wet bath repair durability

    Selecting the right sealant is essential for effectively fixing bathtub drain holes and ensuring a durable, watertight bond. When choosing materials, focus on those designed for wet environments, such as silicone-based or polyurethane sealants.

    These fixing sealants offer strong adhesion, flexibility, and resistance to mold and mildew. Avoid general-purpose adhesives, as they may degrade quickly under constant water exposure. Also, check for compatibility with your bathtub’s material—acrylic, porcelain, or metal—since improper sealants can cause damage or poor adhesion.

    Apply the sealant evenly around the hole, ensuring full coverage. Allow adequate curing time as per manufacturer instructions to maximize effectiveness.

    When to Replace Your Drain Stopper

    After properly sealing holes around your bathtub drain, it’s essential to evaluate the condition of your drain stopper. A damaged or worn drain stopper compromises leak prevention, rendering your repairs ineffective. Replace the drain stopper if you notice cracks, corrosion, or if it no longer fits snugly in the drain opening.

    Additionally, if the stopper fails to hold water or causes slow drainage, it’s time for replacement. Using a malfunctioning stopper can lead to water seeping through gaps, reversing your sealing efforts.

    When selecting a new drain stopper, make sure it matches your drain’s size and type for optimal sealing. Regular inspection and timely replacement of your drain stopper are crucial steps to maintain a watertight seal and safeguard against leaks in your bathtub system.

    Tips to Keep Your Bathtub Drain Leak-Free

    regular sealant inspection and upkeep

    Maintaining a leak-free bathtub drain requires consistent attention to sealing, cleaning, and inspection. Begin with regular hole inspection to identify any cracks or worn areas that compromise the drain’s integrity. Use a flashlight to thoroughly examine the drain surface and surrounding seal.

    Next, focus on sealant selection; choose a high-quality, waterproof sealant compatible with your drain material. Silicone-based sealants often provide durable, flexible seals. Apply sealant evenly around the drain edges, ensuring no gaps remain.

    After application, allow adequate curing time as specified by the manufacturer to maximize effectiveness. Finally, clean the drain area routinely to prevent buildup that can weaken seals. By integrating these steps into your maintenance routine, you’ll effectively prevent leaks and extend the functional life of your bathtub drain.

    Frequently Asked Questions

    Can a Professional Plumber Fix Bathtub Drain Holes?

    Yes, a professional can fix bathtub drain holes efficiently. They’ll assess the damage, select proper materials, and repair holes precisely, ensuring your bathtub drain functions properly without leaks or further damage. You’ll get lasting results.

    How Do Bathtub Drain Holes Affect Water Pressure?

    Ironically, those holes don’t boost your bathwater flow; they disrupt it. You’ll notice decreased drainage speed because water escapes unevenly, causing pressure drops.

    Are There Eco-Friendly Sealants for Bathtub Drain Repairs?

    Yes, you’ll find eco friendly sealants specifically designed for bathtub repair contractors. These non-toxic, low-VOC options guarantee durability while minimizing environmental impact.

    Always consult professionals to select the best sealant for your bathtub’s material and condition.

    Can Bathtub Drain Holes Cause Mold Growth?

    Think of drain holes as tiny gateways. Yes, they can mold by trapping moisture and debris.

    You’ll want to inspect and seal them promptly, preventing mold spores from colonizing and compromising your bathtub’s hygiene and structure.

    How Long Does a Typical Bathtub Drain Repair Take?

    A typical bathtub drain repair takes about one to two hours, depending on damage.

    For effective bathtub maintenance, focus on two-word discussion ideas like “seal integrity” and “drain cleaning” to prevent future issues efficiently.

    Conclusion

    Think of your bathtub drain like a fortress gate—holes are vulnerabilities inviting leaks. By carefully inspecting, sealing with the right materials, and replacing worn stoppers, you reinforce this gate against water’s persistent siege.

    Using plumber’s putty, epoxy, or sealants suited to your tub’s material ensures a tight, lasting barrier. Regular maintenance acts as vigilant guards, preventing future breaches.

    With precise care, you keep your bathtub’s defenses strong and water where it belongs. This approach is essential when you need to plug a bathtub drain with holes effectively.